Vegan Acorn Squash Enchiladas by audrey gebhardt

There was a summer not too long ago that I worked at a mexican restaurant.

Vegan Acorn Squash Enchiladas

We would basically dance around and pour a few margaritas and it seemed like the money followed. In fact, it was pretty often that the owner would pull us out from behind the bar to dance with us while we still had customers waiting to be served.

I have never seen drama anywhere like I saw at this restaurant. There was a constant he said/she said battle between any given servers, someone walking out mid shift every week and employees that only showed up when they felt like it. Along with that, our shift meal was dependent on the mood the chef was in.

_MG_7640.jpg

I decided to take matters into my own hands. It seemed that the more I flirted with the chef, the more food he would make for everyone on staff.

I like to call it taking one for the team.

Anyway- that’s where I first had enchiladas! We didn’t eat a ton of Mexican food growing up, and if we did it was always the simpler nachos or tacos.

_MG_7634.jpg

These enchiladas will please every gluten free/vegan friend you have in your life. It seems like a lot of steps but trust me, it’s worth it. Homemade roasted tomatillo salsa is what makes these so special. And tomatillos are just about the cheapest thing you’ll find in the produce section- you can usually find them for about a dollar a pound (which is a LOT of tomatillos).

_MG_7648.jpg

Vegan Acorn Squash Enchiladas with Homemade Salsa Verde

salsa verde
1 lb tomatillos, husked and washed
1 shallot, sliced
2 cloves garlic
juice and zest of one lime
handful cilantro
one jalapeño
olive oil
salt

enchiladas
14 corn tortillas
1 acorn squash
1 15oz can black beans, drained and rinsed
1 bell pepper, diced
juice and zest of one lime
1/2 tsp cumin
1/2 tsp chili powder

1 c vegetable stock
1 TBSP cornstarch

pico de gallo, to top

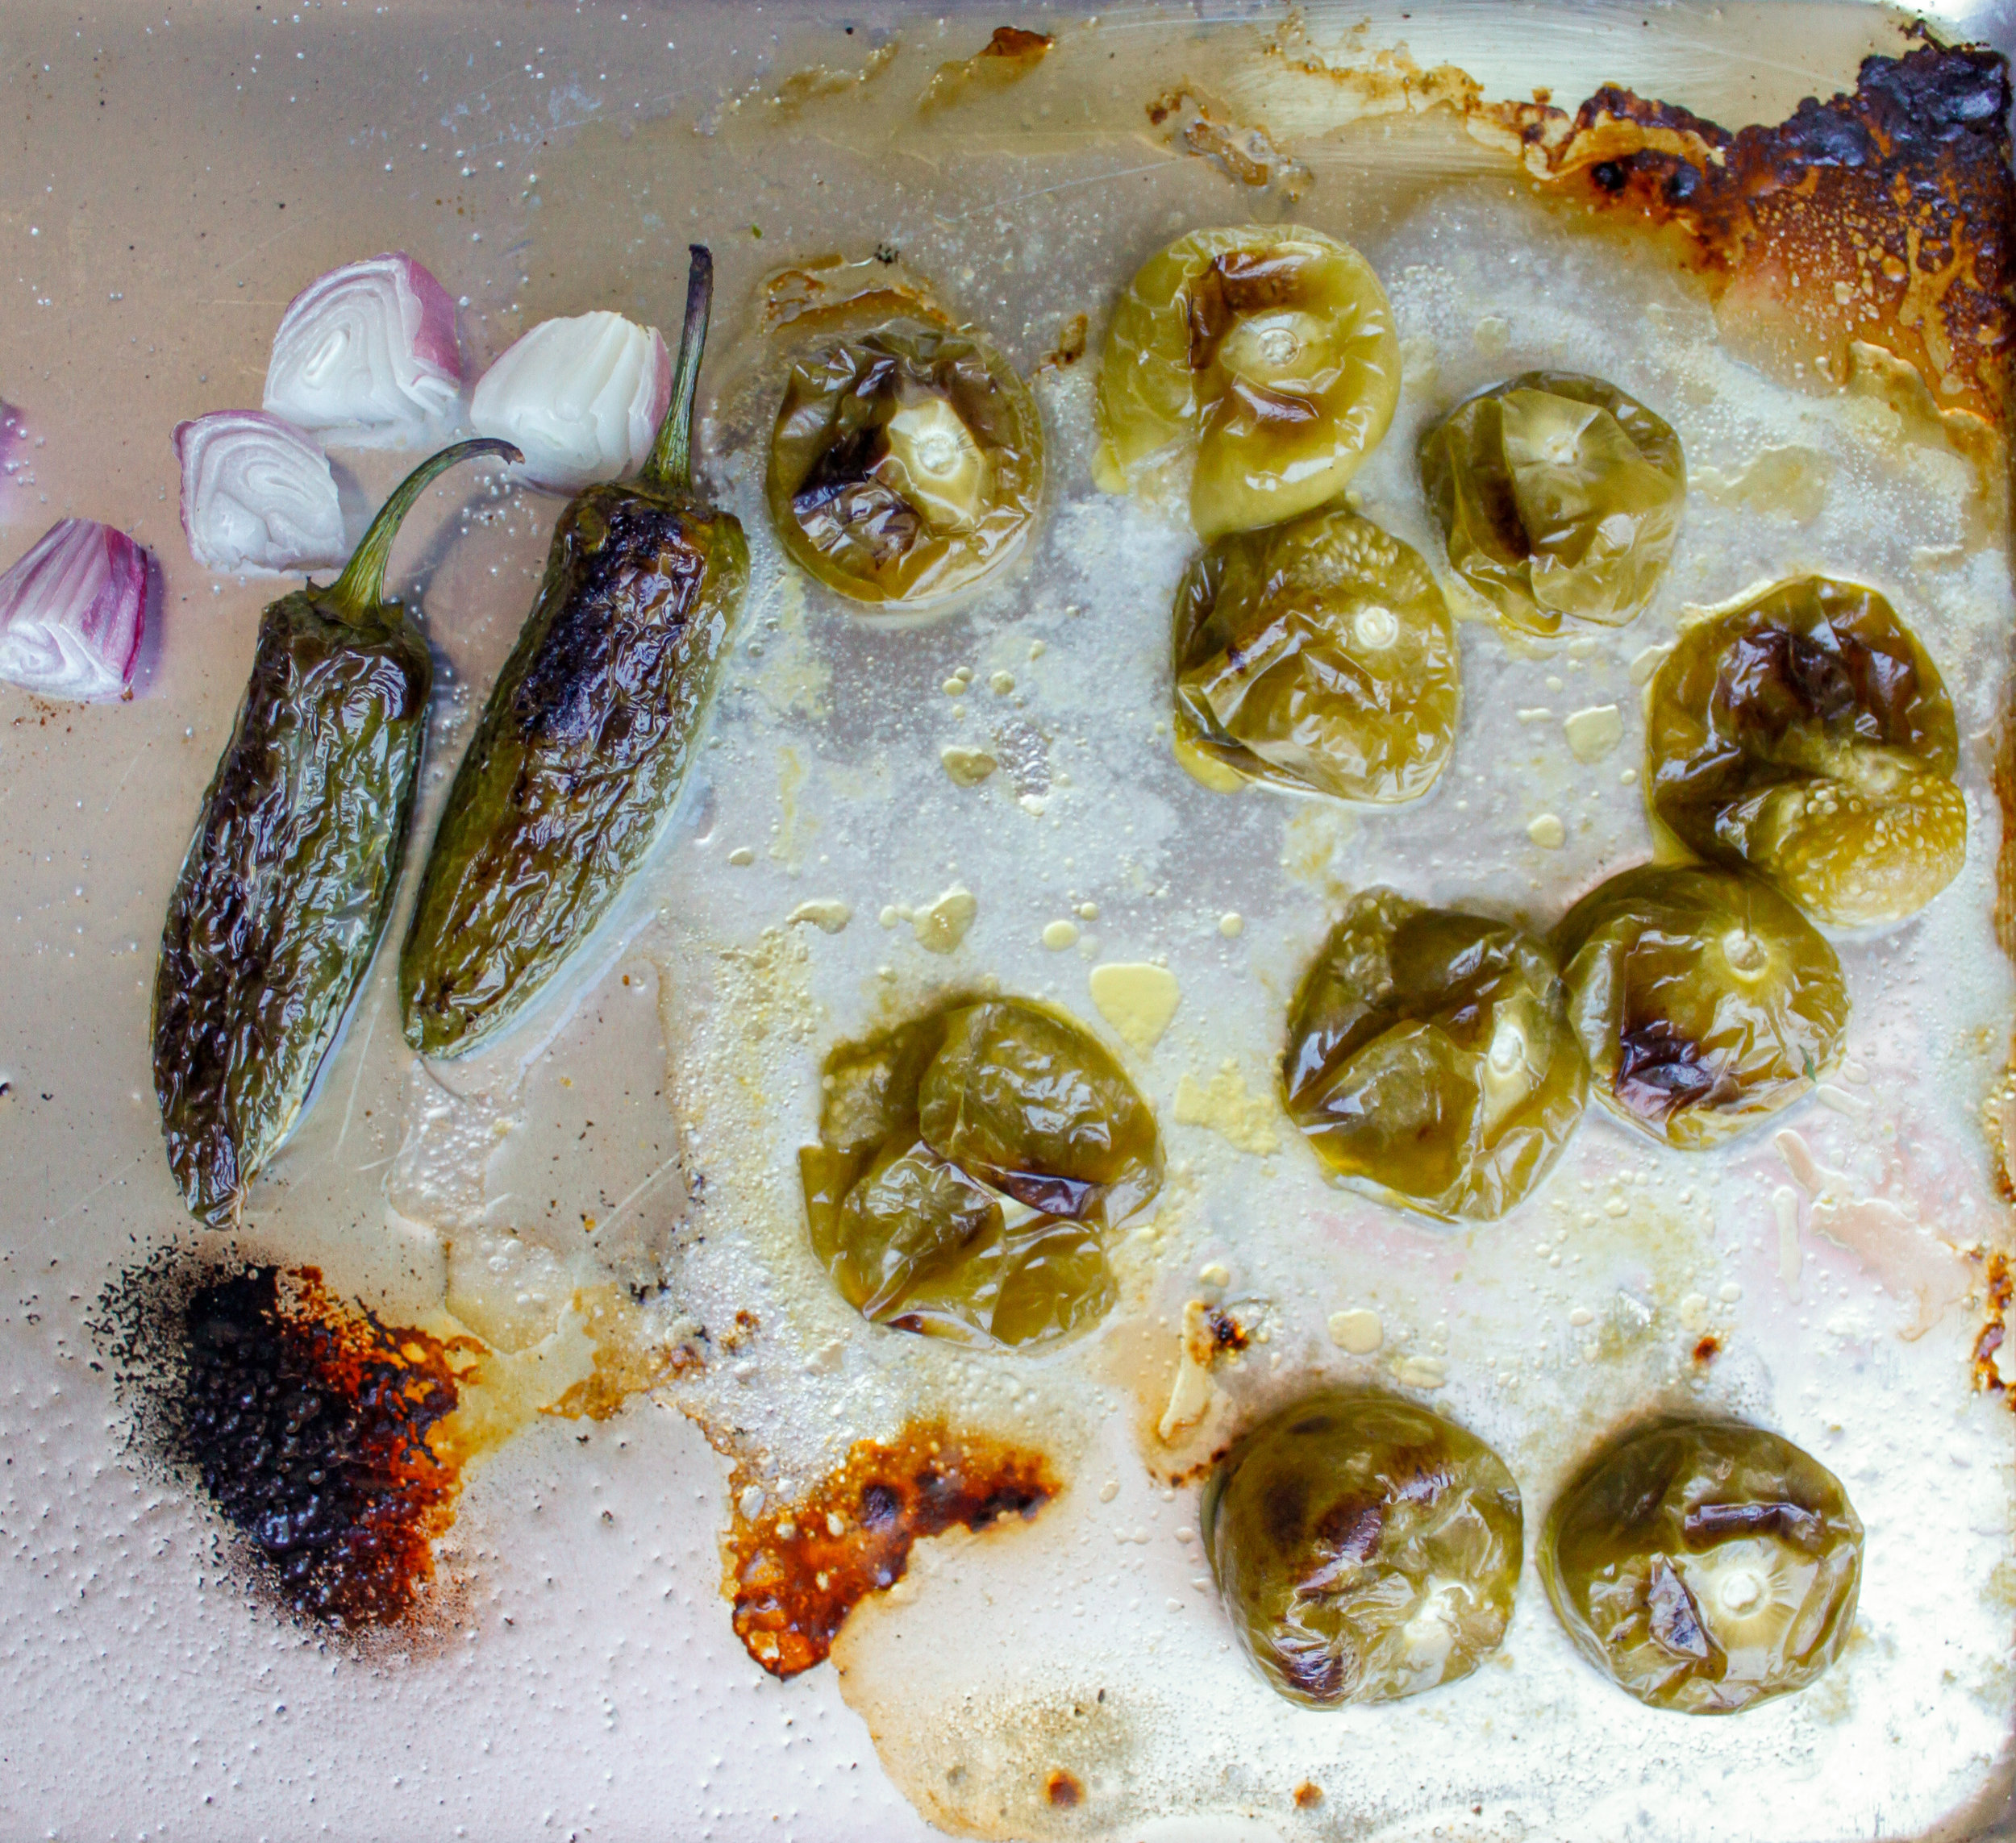
Make the salsa verde/enchilada sauce:
preheat the oven to 450. Place the tomatillos stem side down on a baking sheet, as well as the jalapeño and shallot. Take a piece of foil and wrap up the garlic cloves with a drop of olive oil and place the packet on the baking sheet as well. drizzle the tomatillos, jalapeño and shallot with oil and bake at 450 for about 20 minutes until the skins are beginning to brown and maybe the tomatillos are even starting to burst. Flip over and roast for another ten minutes. Allow to cool to near room temperature, then blitz everything in a blender (less the stem of the jalapeño- but leave the seeds in for heat!) until combined (I used my nutri ninja and it worked great!)

This salsa verde is great right here as it is. I love it on chips, tacos, anything really. But we’re here for enchiladas! So let’s turn this salsa into enchilada sauce.

In a small saucepan, combine the cornstarch with 1/4 c of the stock and whisk over medium heat until there are no more lumps. add the rest of the stock and the salsa verde and heat through.

For the enchiladas:
Roast the acorn squash! You can do this at the same time as you roast the stuff for the salsa. Cut the acorn squash in half lengthwise, scoop out the seeds and drizzle with a bit of olive oil. Bake at 450 for about an hour until the insides are soft.

Make the filling: Scoop the roasted acorn squash into a large bowl and discard the skin. Combine the rest of the ingredients (minus the corn tortillas) in the same bowl with a fork until mixed throughly.

Heat the tortillas: I did 7 at a time in the microwave for 30 seconds under a damp paper towel. This prevents them from ripping when you go to roll them!

In a 9x13” or two 8” pans, spread enough of the enchilada sauce to cover the bottom of the pan.

Scoop 1/2 c of the filling into the center of a tortilla and wrap it up, placing the seam side down in the bottom of the pan. Repeat until all the enchiladas are rolled, then top with the remaining enchilada sauce and bake at 375 for 30 minutes until the sauce is bubbling and the edges of the enchiladas are just starting to brown up.

Remove from oven and top with pico de gallo to serve!!

If you have non-vegans, of course you can top the enchiladas with cheese before baking and sour cream after baking!

These can be prepared up to 24 hours in advance and covered once assembled, just bake them off when you’re ready to eat!

xo
Audrey

Carrot Cake Cinnamon Rolls by audrey gebhardt

I’m not here to tell you to eat your vegetables.

carrot cake cinnamon rolls

My strategy lately is more like, eat all of the sugar until your body absolutely cannot take it anymore and it’s actually craaaaaving green things.

Carrot Cake Cinnamon Rolls

So like, have a salad and the next morning throw some carrots in your cinnamon rolls and we’ll call it even, yeah?

I was really skeptical of carrot cake for a while, I promise you. And then I saw one that I just couldn’t resist with stripes of cream cheese frosting and I was quickly in love. I even choose carrot cake over chocolate things sometimes!

Carrot Cake Cinnamon Rolls

These cinnamon rolls are rich, creamy, and bursting with flavor having been stuffed with toasted pecans and brown sugar. For a yeast dough, this one is fairly simple and straightforward! Don’t be alarmed by the amount of ingredients and steps, just read the whole recipe through once and then take it one step at a time. That is allllll bread is. One step at a time.

The carrots in this recipe add a really nice texture to the dough, they almost melt into it and it feels like you’re eating funfetti cinnamon rolls!

_MG_7621.jpg

Carrot Cake Cinnamon Rolls
makes 2 dozen

for the dough:
2 cups whole milk
1/2 c unsalted butter (1 stick)
1/2 c sugar
1 packet yeast (2 1/4 tsp)
1 1/2 c grated carrots (about 3 medium)
1/2 tsp nutmeg
1/2 tsp freshly grated ginger
4 1/2 c all purpose flour, divided
1/2 tsp baking powder
1/2 tsp baking soda
1 tsp salt

for the filling:
1/2 c unsalted butter, melted
1 c brown sugar
2 tsp cinnamon
2 c pecans, chopped
1/2 c shredded coconut (optional)

for the cream cheese frosting:
4 oz cream cheese (or mascarpone! I used mascarpone! it’s so creamy!)
1.5 c powdered sugar
1 tsp vanilla extract
2 TBSP milk

For the dough:
-Combine the milk, butter and sugar in a large pot over medium heat. Bring just to a simmer and stir to dissolve sugar. Allow to cool to a temperature that feels like a hot shower you’d want to get into after a day in the snow (about 105 degrees). Sprinkle the yeast over the top and allow to sit for about three minutes.

-While the yeast mixture is setting, grate the carrots over a clean dishtowel that you don't care about at all. Squeeze the carrots out over a sink and squeal in delight at the vibrant orange color that carrot juice actually is. You’re drying the carrots out as much as possible here so the water content doesn’t mess with the dough.

-Pour the yeast/milk mixture into a large bowl. Stir in two cups of the flour, the nutmeg and the ginger until combined. Stir in another cup, and stir in a final cup of flour with the grated carrots until combined. Cover with a damp towel and allow to proof for about an hour in a draft free space. (you can put this in the oven with the oven turned off but the oven light turned on- the heat from the light creates a really great temperature for proofing!

-After an hour the dough should be doubled in size and smell yeasty. Stir in the final 1/2 cup flour along with the baking powder, baking soda and salt. Turn out onto a generously floured surface and knead slightly. You want this dough to be soft but not too sticky to roll out- add flour 1/4 cup at a time if it feels too sticky!

-Grease two 9” pans with butter or canola oil. Set aside.

-Divide dough into two equal rounds and then roll out into rectangles that are about 1/4” thick, about 10”x16”

-Melt the butter. Pour half of the butter mixture onto the first rolled out rectangle, brush the butter to evenly cover the surface leaving a 1/2” boundary around all edges. Sprinkle half of the brown sugar evenly across the surface, followed by half of the cinnamon and pecans and coconut, if using.

-Starting from the far edge, slowly roll the dough into a log (lengthwise). I like to use my fingers in a typewriter fashion here, moving from one end of the log to the other. Cut the log into 12 equal rolls using a bench scraper, then place in the pie dish cut side up. It’s okay if it’s not perfect! You’re covering it with icing later! And no one on this good earth has ever been mad about an ugly cinnamon roll once it goes in their face, I promise.

-Repeat with the other half of the dough, and allow both trays to sit on the stove for a second proof while you preheat the oven to 375.

-Bake for 20-22 minutes, until golden brown.

-While the rolls are baking, whisk together all the ingredients for the frosting until it’s pourable, adjusting the confectioners sugar and milk as needed to get it to your desired texture.

-Pour the frosting onto the rolls immediately after they come out of the oven- these are fantastic hot or at room temperature, we ate them for every meal for an entire day!!

YAY! YOU DID IT! NOW YOU GET TO EAT SOME BUNNNNNSSS TO CELEBRATE!

Pumpkin Bread with Pecan Streusel by audrey gebhardt

When I was a kid, I had a very strict self-inflicted bedtime.

Gluten Free Pumpkin Bread

I remember hysterically crying backstage at a dance recital in my can-can costume because I looked at the clock and it was past 8pm. My parents were the kind that let us fall asleep when we wanted to fall asleep, but I came up with very strict (albeit arbitrary) rules for myself. One of them was that I had to be asleep by 8pm or I would get overtired and I would never fall asleep. I was like a teeny tiny mini mom to myself.

At parties at my aunt’s house, I’d ask my mom what time it was and the answer was always 7:45. She would tell me that for hours and I would believe her- because it would mean I didn’t need to have a meltdown about not being asleep on time.

My brother, on the other hand, could stay awake until the sun came up. He would stay up all night reading books and playing video games and someeeetimes making pumpkin bread with my mom at 10pm when the first chill of fall fell into the air.

About once a year, my mom would wake me up when it felt like the middle of the night and sit on the edge of my bed with a paper towel topped with a warm piece of pumpkin bread in her hands. There was nothing better. It was the only time I was allowed to eat in my bedroom AND go back to sleep without brushing my teeth first.

I get it, I think she just missed us when we were asleep. I was always the babysitter that woke the kids up so I could keep playing with them. #sorrynotsorry

Gluten Free Pumpkin Bread

Pumpkin Bread with Pecan Streusel (Gluten Free)

2 c sugar
1 c (2 sticks) butter, melted
3 eggs
2 c (or 15oz) pumpkin puree
3 c gluten free flour (I have a new favorite!!!!)
1/2 tsp baking soda
1 tsp nutmeg
1 tsp cinnamon

topping:
1 1/4 c gluten free flour
1/2 c light brown sugar
1 tsp cinnamon
1 stick butter, melted
1/2 c pecans, chopped

Preheat the oven to 350 and line two loaf pans with parchment.

In a medium bowl, make the topping. Combine the flour, brown sugar and cinnamon and stir until mixed. Slowly stir in the butter until big crumbles form and add the pecans.

Make the bread. In a large bowl, whisk together the melted butter and sugar until combined. Whip in the eggs and pumpkin until smooth. Whisk in all dry ingredients until combined. Divide into the two pans and top each with half of the crumble mixture.

Bake at 350 for an hour and ten minutes until a toothpick inserted in the center comes out clean!

Keeps well in an airtight container at room temperature for up to 5 days.

Deep Dark Fudge Brownies (GF) by audrey gebhardt

Let's talk about babysitter slices for a minute.

_MG_7515.jpg

You know, the kind you take when you're babysitting and they have MUCH better snacks at their house than you do at yours.

I'm talking entenmanns fudge frosted cake.

Or like two day old glazed munchkins.

Capri Sun. Ugggghhhhhh. 

The best houses though are the ones with a tray of boxed brownies. Shiny and crinkled studded with chocolate chips. You would slice off millimeter by millimeter of those brownies so the parents wouldn't know that you ate all of their snacks, right?

_MG_7514.jpg

Now, as a functioning adult, I am totally aware of the fact that the parents would not give a hoot about whether or not I was eating their snacks. In fact, they probably would want me and my 15 year old metabolism to help them with that tray of brownies. But for whatever reason it felt like a scandalous secret to sneak slices of sugar after the kids went to bed, did it not? 

_MG_7509.jpg

These brownies are reminiscent of that simple add oil water and egg boxed mix you made when you were a kid except they're about a billion times fudgier and gooier and yummier. 

_MG_7511-2.jpg

Deep Dark Fudge Brownies
(this recipe is kind've in weight. Please don't hate me. I promise it makes a difference)

85g Gluten Free Flour
1/2 tsp baking powder
1/2 tsp salt
1 1/2 sticks unsalted butter
300g sugar
3 eggs
75g cocoa powder
1 TBSP vanilla (for real no joke)
4oz dark chocolate, chopped

Preheat the oven to 350 and line an 8" square pan with parchment paper.

Whisk together the flour, baking powder and salt and set aside.

In a different bowl, whisk together the eggs, cocoa and vanilla for about a minute until super smooth and glossy.

In a medium saucepan, melt the butter and sugar over medium low heat whisking constantly. Don't let it bubble! Keep it low until the sugar has dissolved! Rub a tiny bit between your fingers to see if it's smooth. 

Slowly stream the melted butter mixture into the egg/cocoa mixture while whisking constantly until combined and then whisk for another whole entire minute- this is what will give you that glossy cracky top! Fold in the dry ingredients juuuuuust until combined, tossing the chopped chocolate near the end and folding that in too!

Spread evenly into the parchment lined pan and bake for 25 minutes, until the center is just set and doesn't jiggle when you wiggle the pan.

Let cool in the pan or be impatient like me and dig in with a spoon and burn the roof of your mouth with melted chocolate, both ways are totally okay.

Let's go have some brownies about it, shall we?

xo
Audrey

Peach Apple Pie (V) by audrey gebhardt

Let's talk about making people feel special for a second. 

Vegan Peach Pie

The other day I was at the doctor for my annual when she asked me to hop on the scale.

I do not own a scale, I don't much care about the number and I don't really feel a need to obsess over it the way I did when I was 14. I care so much more about how I feel in my body and my clothes.

Anyway, I hopped on the scale and the doctor immediately looked at the number and subtracted two pounds and said, 'how do we feel about this number'. And I just couldn't get over her willingness to overlook science for how someone might feel. I thought it was the simplest thing ever that could make the majority of women standing naked on a scale feel so so good, that she's willing to record the weight as a lower number because at the end of the day those two pounds don't really matter. 

It got me thinking about where else could we make people feel special when it's not really expected- which got me thinking about injecting small kindness everywhere. I can't even tell you how many grocery store check-out clerks are astonished when I make eye contact and ask them how their day is and actually listen to the answer on the other end of that question. 

Palisade Peaches

Tiny things like when someone holds the top of the receipt for you when you sign it make me feel so human to human with other humans. And my faaaaavorite- when someone holds your hand in both of yours when you shake their hand for the first time. Omgggg that is the best way to make a person feel special.

How else can we make people feel special? What if you baked this pie and left it cooling in the windowsill and then invited your neighbor over for a slice and some tea this afternoon like it was 1956? Would that be so strange? Could it also be SO GOOD?!

Vegan Peach Pie

Peach Apple Pie (Vegan)

1 Olive Oil Pie Crust, divided in two

3 medium ripe peaches
3 medium apples (I used Gala because it's what I had, anything super crisp will do-- honey crisp, gala, green)
1 TBSP cornstarch
1/3 c sugar
1 tsp cinnamon
1/4 tsp nutmeg

1 TBSP almond milk
1 TBSP maple syrup

Prepare the crust, separate into two parts and wrap tightly before setting aside while you prepare the filling.

Cut the peaches in half, remove the pit and then cut each half into eighths lengthwise. Cut the apples into quarters, cut out the core and then cut each quarter into thirds. (You read that right. We are barbarically not going to peel these fruits because you won't event notice the peel after it's baked and you will do like a tenth of the work to make this pie.)

In a small bowl, stir together the cornstarch, cinnamon and nutmeg. 

In a large bowl, toss together the spice mixture with the cut fruit.

Preheat the oven to 375.

Roll out one half of the dough so it's 1/8" thick (about the thickness of a nickel) between two pieces of parchment. Peel away the top layer of parchment and use the bottom layer to help you flip the dough into the 10" pie plate.

Roll out the other half of the dough and if you plan on losing your mind and making yourself crazy cut it into 1/4" strips but if you want to stay sane just use it like a regular pie crust.

Top the crust with the fruit then top the fruit with the crust however you see fit! To make it look how I did there's a bunch of pinching and twisting and crust breaking and tears involved. To make it look like a regular pie, just run a fork around the edge of the pie to seal it all together.

In a small bowl, mix together the almond milk and maple syrup.

Bake at 375 for 30 minutes until the fruit just begins to bubble then remove from the oven and brush with the almond milk/maple syrup mixture. 

Bake for another 10 minutes until it's golden brown on top and let cool before serving! 

This pie is BOMB the next day after it's been in the fridge. Or maybe it's just me. I love cold pie. I love you!

xo
Audrey

Sweet Potato Waffles (V + GF) by audrey gebhardt

Two of my Christmas gifts from the year 2000 have proven to be timeless so far.

Vegan + Gluten Free Sweet Potato Waffles

My bike (I'm still riding a kid-sized 21 speed Raleigh and I LOVE it), and my Grinch Waffle Iron.

This waffle iron made our house the sleepover house. That, and my mom was the sleepover queen. We could stay up as late as we wanted as long as we were dancing with her. She would let us use air mattresses as slides, she would have a craft ready for us to do, she made the comfiest beds on couches to sleep on and in the morning- she always made grinch waffles. 

Much more exciting than your standard belgian waffle, grinch waffles were a topic of discussion. The swirls that the syrup could swim through- the perfect circle in the middle for a pool of butter or whipped cream.

Vegan + Gluten Free Sweet Potato Waffles

My mom was also the cool aunt. The one who let my little cousins and I eat whipped cream straight from the can at 8am. 

My mom didn't have lots of rules, she mostly just did whatever she could to make sure everyone around her was having the most fun at all times. 

Vegan + Gluten Free Waffles

Sweet Potato Waffles (Vegan + Gluten Free)
makes 4

1 c cooked sweet potato
1 c oats
1 flax egg (1 Tbsp ground Flax seed + 3 Tbsp water, let sit for five minutes)
1/2 c almond milk
1 Tbsp maple syrup
1 tsp baking powder
1/2 tsp baking soda
1/2 tsp cinnamon
1/2 tsp vanilla

cooking spray, for waffle iron.

coconut cream (the top part of refrigerated coconut milk), for serving

In a blender, combine all ingredients and blend until smooth. Add more almond milk a tablespoon at a time if it doesn't seem like it will pour smoothly until it's pourable.

Heat the waffle iron and spray with cooking spray.

Pour about 1/3 cup of batter  into the iron and cook for 3-4 minutes, until golden brown.

Serve with a dollop of coconut cream (which you make by refrigerating a can of coconut milk and scooping off the thick creamy white part from the top) and maple syrup. I serve it like this for the nostalgia of when you get a waffle at a diner served with an ice cream scoop full of butter. 

This batter can be refrigerated for up to 2 days! Add a bit more milk to thin out before using.

xo
Audrey

Penne Ala Vodka (V) by audrey gebhardt

Penne Ala Vodka is the first dish I mastered. 

Vegan Penne Ala Vodka

I've been whipping up pots of orange pasta for crowds for over a decade now. I remember one of the first times I made this for more than just my immediately family, we were out in Montauk having a beach vacation with a bunch of friends. 

It was late September and grey and chilly and foggy and rainy, much like it's been in Denver these past couple of days. I had the windows open when I made the sauce because I'm neurotic about the house smelling like onion and people staying at the condo a few doors down knocked on the door because they could smell how good this sauce was. If that's not a testament to how bomb this sauce is, I don't know what is! That version of it had a good bit of butter and heavy cream, but I've swapped those out for homemade cashew cream and olive oil and can't even tell the difference.

This recipe is a triple whammy, not only are you learning how to make my favorite sauce- you're also getting recipes for the simplest and most versatile cashew cream and vegan parmesan!

vegan cashew cream

Vegan Penne Ala Vodka
makes enough sauce to 1 pound of pasta

cashew cream:
1 cup raw cashews, soaked overnight (alternately, you can cover them with boiling water for about an hour until they plump up)
1/2 c water

vegan parmesan:
1/4 c raw cashews
1 TBSP nutritional yeast
pinch salt

vodka sauce:
4 TBSP olive oil
5-7 green onions, chopped
3 cloves garlic, grated or chopped
15 oz tomato sauce
1/4 c vodka
1 1/2 tsp oregano
1/2 tsp salt
pinch red pepper
1/2 tsp dried basil or a few fresh basil leaves
1/3 c cashew cream 

Prep the cashew cream: Drain the cashews and blend them with the new fresh water for about 3-5 minutes until silky and creamy. For this recipe, I like this a little bit on the thicker side (you can always add more water to thin it out later). Set aside.

In a medium saucepan, sauté the green onions and garlic in the olive oil over medium heat until the onions are softened, about 3 minutes. Add the tomato sauce, vodka, oregano, salt, red pepper and basil. Bring to a simmer then lower the heat to low and simmer, uncovered, for 30-45 minutes until thickened and fragrant. Add 1/3 c of the cashew cream and simmer for another ten minutes before tossing with your favorite pasta (I use Barilla Gluten Free).

While the sauce is simmering, make the vegan parm. In a coffee grinder or a food processor, blitz the cashews, nutritional yeast and salt for about a minute until the cashews have been broken down to grated parmesan sized pieces (don't blend too long or you'll have cashew butter!)

Sauce will keep in the fridge for up to a week and it freezes beautifully as well!

xo
Audrey

Mini Blueberry Pies (V) by audrey gebhardt

When I was a kid my family would spend a week on a lake in New Hampshire every August and it was the BEST. 

We would paint rocks and jump off docks and make up songs to sing and play cards all night and sneak onto private islands to collect dozens of solo cups full of wild blueberries. 

vegan blueberry pie

There was one year that we showed up at our house and there was a family of bats living inside so we spent the better part of the afternoon ushering the bats outside with our beach towels and bags of potato chips.

There was the year that we stood on the side of the road staring at a field for a good hour waiting for a moose to show up, until a sheriff came along to ask us what we were doing.

One of the early years, I thought that "Here Comes the Sun" was the only song that existed because Uncle Frank played it on repeat for the whole week. Literally, I thought it was the only song ever and that it was all of music.

There was the last year that we went to blueberry island and the water police came kicked us off the island that did not belong to us. The place with the secret cabin and giant boulder that we would climb and feel like we were on top of the world. I was probably 10, and I cried a lot holding that cup full of my final Blueberry Island blueberries. 

Back in those days we would just eat the blueberries by the handful, but now when I have a surplus I would turn them into something a bit sweeter.

These blueberry pies are charming and adorable and come together so quickly. You can make them into a regular size pie and I would probably still want an invite to your house.

Vegan Blueberry Pie

Mini Blueberry Pies (Vegan)
makes 24

1 olive oil pie crust (I know I link back to this one all the time, I truly just don't see a reason to ever make another kind've pie crust again. It's the easiest and the flakiest and so versatile)

3 cups blueberries, washed & picked through for stems
2/3 c sugar
3 TBSP cornstarch
1/2 tsp cinnamon

Preheat the oven to 375. 

Roll out the pie crust to 1/8-1/4" thick. Cut into 24 circles using a 3" round cookie cutter.

In a medium bowl, combine the blueberries, sugar, cornstarch and cinnamon. 

Gently press the circles of pie dough into mini muffin tins, and spoon enough of the blueberry mixture into the crust so it's heaping over the top. 

Bake for 25-30 minutes, until the blueberries cook down and the crust just begins to turn golden.

Allow to cool completely in the tray before running a knife around the edge to loosen and pop out.

Store in an airtight container in the fridge for up to three days!

xo
Audrey