Dessert

The Best Crumb Cake of All Time by audrey gebhardt

If you’re ever wondering how to do very well in high school without carrying any books ever, this crumb cake is the answer. Well, this and chocolate chip cookies.

This recipe comes together in under an hour, doesn’t require any fancy tools or equipment, and is perfect for a weekend breakfast when you’re craving something sweet and only have a few ingredients around.

This is straight up Martha Stewart’s recipe, I haven’t changed one single thing because not one single thing needs changing. However- I have made this in many different ovens and sometimes it bakes for 20 minutes and it’s done and sometimes it needs 30 minutes, so just keep an eye on it after 20 and poke it with a toothpick every so often until comes out mostly clean with a few moist crumbs attached.

Take note that while this cake is DELICIOUS straight out of the oven, it’s most authentically eaten at room temperature, when the crumbs have had a chance to cool and congeal. This is one of the only times that we’re happy about things congealing and not grossed out by it. Once this cake is cool, the crumbs will have that beautiful melt-in-your-mouth texture. This cake keeps really well for up to a week stored in an airtight container!

Perfect Crumb Cake

Perfect Crumb Cake
Recipe from Martha

1 1/2 c flour
1/2 c sugar
2 1/2 tsp baking powder
1/2 tsp salt
1 egg
1/2 c milk
2 TBSP canola/veg oil
2 tsp vanilla

1 c light brown sugar
2 1/2 c flour
1 1/2 tsp cinnamon
2 sticks unsalted butter, melted and cooled

1/2 c confectioners sugar

Preheat the oven to 325.

Grease and flour a 9x13” cake pan.

In a medium bowl, whisk together the 1 1/2 c flour, sugar, baking powder and salt. In a separate bowl, whisk together the egg, milk, oil and vanilla. Add the dry ingredients to the wet and stir until combined. Spread into the 9x13” pan and set aside.

In the bowl you used the dry ingredients for, stir together the light brown sugar, remaining flour and cinnamon. Stir in the butter until combined and using your hands, break crumbs of the mixture off and cover the entire cake with crumbs. Bake for 20-30 minutes until a toothpick inserted in the center comes out clean.

When the cake has cooled slightly, dust the top with confectioners sugar.

xo,
Audrey


Ballin' on a Budget: Feelings Pudding by audrey gebhardt

What do you do when you’re overwhelmed with emotion? Aside from crying, I mean. What do you do with your body?

Do you go for a run (lol)? Turn on really loud music and dance? Fall into a netflix hole?

I make pudding.

Feelings Pudding

There’s something so meditative to me about stirring a milk and eggs over a low flame until it turns into a luscious creamy chocolate pudding.

I’ve made this when I’m falling in love, when I’m heartbroken, when I’m scared, when I’m excited- really anytime I have extra feelings in my body that I’m not quite sure what to do with. I just stir them into pudding.

The other amazing thing about this recipe is that it can be made pretty much anywhere- it requires so little equipment and so few ingredients which makes it a perfect recipe for you to make as a houseguest- I love leaving these behind when I stay with friends! The vessel you put it in doesn’t matter so much, this recipe is pretty forgiving and can be made in a pot, a pan, a tart shell, a 9x13” pan or a cauldron.

It’s dairy free, costs about $8 to make and comes together in about fifteen minutes of active prepwork plus about 45 minutes of chilling time in the fridge. This can be made a few days ahead of serving and kept covered in the fridge until you’re ready to serve.

THE ONLY RULE WITH FEELINGS PUDDING: You MUST eat this straight out of the container. The only way you can serve it is by handing people spoons. If you are not comfortable eating this straight out of the container with the people you are serving it to, they are not close enough to you to eat feelings pudding with.

Feelings Pudding

Feelings Pudding
(makes enough)

20 vanilla oreos
2 TBSP coconut oil

1 can full fat coconut milk
2 egg yolks
1 12oz bag bittersweet chocolate chips (I like Ghirardelli)

flaky salt

Crush the oreos. I did this in a large ziplock with a rolling pin but you can use a food processor- you just want them to be in fine crumbs. Combine the oreo crumbs with the coconut oil and press into your pan. I used a 9” pie dish, but this will really work in any shape pan- a bread pan, an 8x8” pan, a small pot- whatever you’ve got! Place the crust in the freezer to set up while you make the custard.

In a saucepan over a low flame, combine the whole can of coconut milk and egg yolks. Whisk, constantly, until the mixture coats the bottom of a spoon (this means that when you dip the spoon in and run your finger through it, the custard holds its place and doesn’t fill in where you’ve run your finger through). Remove from heat and pour the chocolate chips in. Cover them completely with the liquid and let them sit for a minute to soften, then whisk until he mixture is smooth and shiny.

Pour the custard through a fine mesh sieve and then into the crust, which should be fairly set by now. Put the feelings pudding back in the freezer for 20 minutes or in the fridge for 45 minutes-1 hour until it doesn’t wiggle when you move the dish. Top with flaky sea salt, give everybody a spoon and have some feelings about it.

xo
Audrey

Carrot Cake Cinnamon Rolls by audrey gebhardt

I’m not here to tell you to eat your vegetables.

carrot cake cinnamon rolls

My strategy lately is more like, eat all of the sugar until your body absolutely cannot take it anymore and it’s actually craaaaaving green things.

Carrot Cake Cinnamon Rolls

So like, have a salad and the next morning throw some carrots in your cinnamon rolls and we’ll call it even, yeah?

I was really skeptical of carrot cake for a while, I promise you. And then I saw one that I just couldn’t resist with stripes of cream cheese frosting and I was quickly in love. I even choose carrot cake over chocolate things sometimes!

Carrot Cake Cinnamon Rolls

These cinnamon rolls are rich, creamy, and bursting with flavor having been stuffed with toasted pecans and brown sugar. For a yeast dough, this one is fairly simple and straightforward! Don’t be alarmed by the amount of ingredients and steps, just read the whole recipe through once and then take it one step at a time. That is allllll bread is. One step at a time.

The carrots in this recipe add a really nice texture to the dough, they almost melt into it and it feels like you’re eating funfetti cinnamon rolls!

_MG_7621.jpg

Carrot Cake Cinnamon Rolls
makes 2 dozen

for the dough:
2 cups whole milk
1/2 c unsalted butter (1 stick)
1/2 c sugar
1 packet yeast (2 1/4 tsp)
1 1/2 c grated carrots (about 3 medium)
1/2 tsp nutmeg
1/2 tsp freshly grated ginger
4 1/2 c all purpose flour, divided
1/2 tsp baking powder
1/2 tsp baking soda
1 tsp salt

for the filling:
1/2 c unsalted butter, melted
1 c brown sugar
2 tsp cinnamon
2 c pecans, chopped
1/2 c shredded coconut (optional)

for the cream cheese frosting:
4 oz cream cheese (or mascarpone! I used mascarpone! it’s so creamy!)
1.5 c powdered sugar
1 tsp vanilla extract
2 TBSP milk

For the dough:
-Combine the milk, butter and sugar in a large pot over medium heat. Bring just to a simmer and stir to dissolve sugar. Allow to cool to a temperature that feels like a hot shower you’d want to get into after a day in the snow (about 105 degrees). Sprinkle the yeast over the top and allow to sit for about three minutes.

-While the yeast mixture is setting, grate the carrots over a clean dishtowel that you don't care about at all. Squeeze the carrots out over a sink and squeal in delight at the vibrant orange color that carrot juice actually is. You’re drying the carrots out as much as possible here so the water content doesn’t mess with the dough.

-Pour the yeast/milk mixture into a large bowl. Stir in two cups of the flour, the nutmeg and the ginger until combined. Stir in another cup, and stir in a final cup of flour with the grated carrots until combined. Cover with a damp towel and allow to proof for about an hour in a draft free space. (you can put this in the oven with the oven turned off but the oven light turned on- the heat from the light creates a really great temperature for proofing!

-After an hour the dough should be doubled in size and smell yeasty. Stir in the final 1/2 cup flour along with the baking powder, baking soda and salt. Turn out onto a generously floured surface and knead slightly. You want this dough to be soft but not too sticky to roll out- add flour 1/4 cup at a time if it feels too sticky!

-Grease two 9” pans with butter or canola oil. Set aside.

-Divide dough into two equal rounds and then roll out into rectangles that are about 1/4” thick, about 10”x16”

-Melt the butter. Pour half of the butter mixture onto the first rolled out rectangle, brush the butter to evenly cover the surface leaving a 1/2” boundary around all edges. Sprinkle half of the brown sugar evenly across the surface, followed by half of the cinnamon and pecans and coconut, if using.

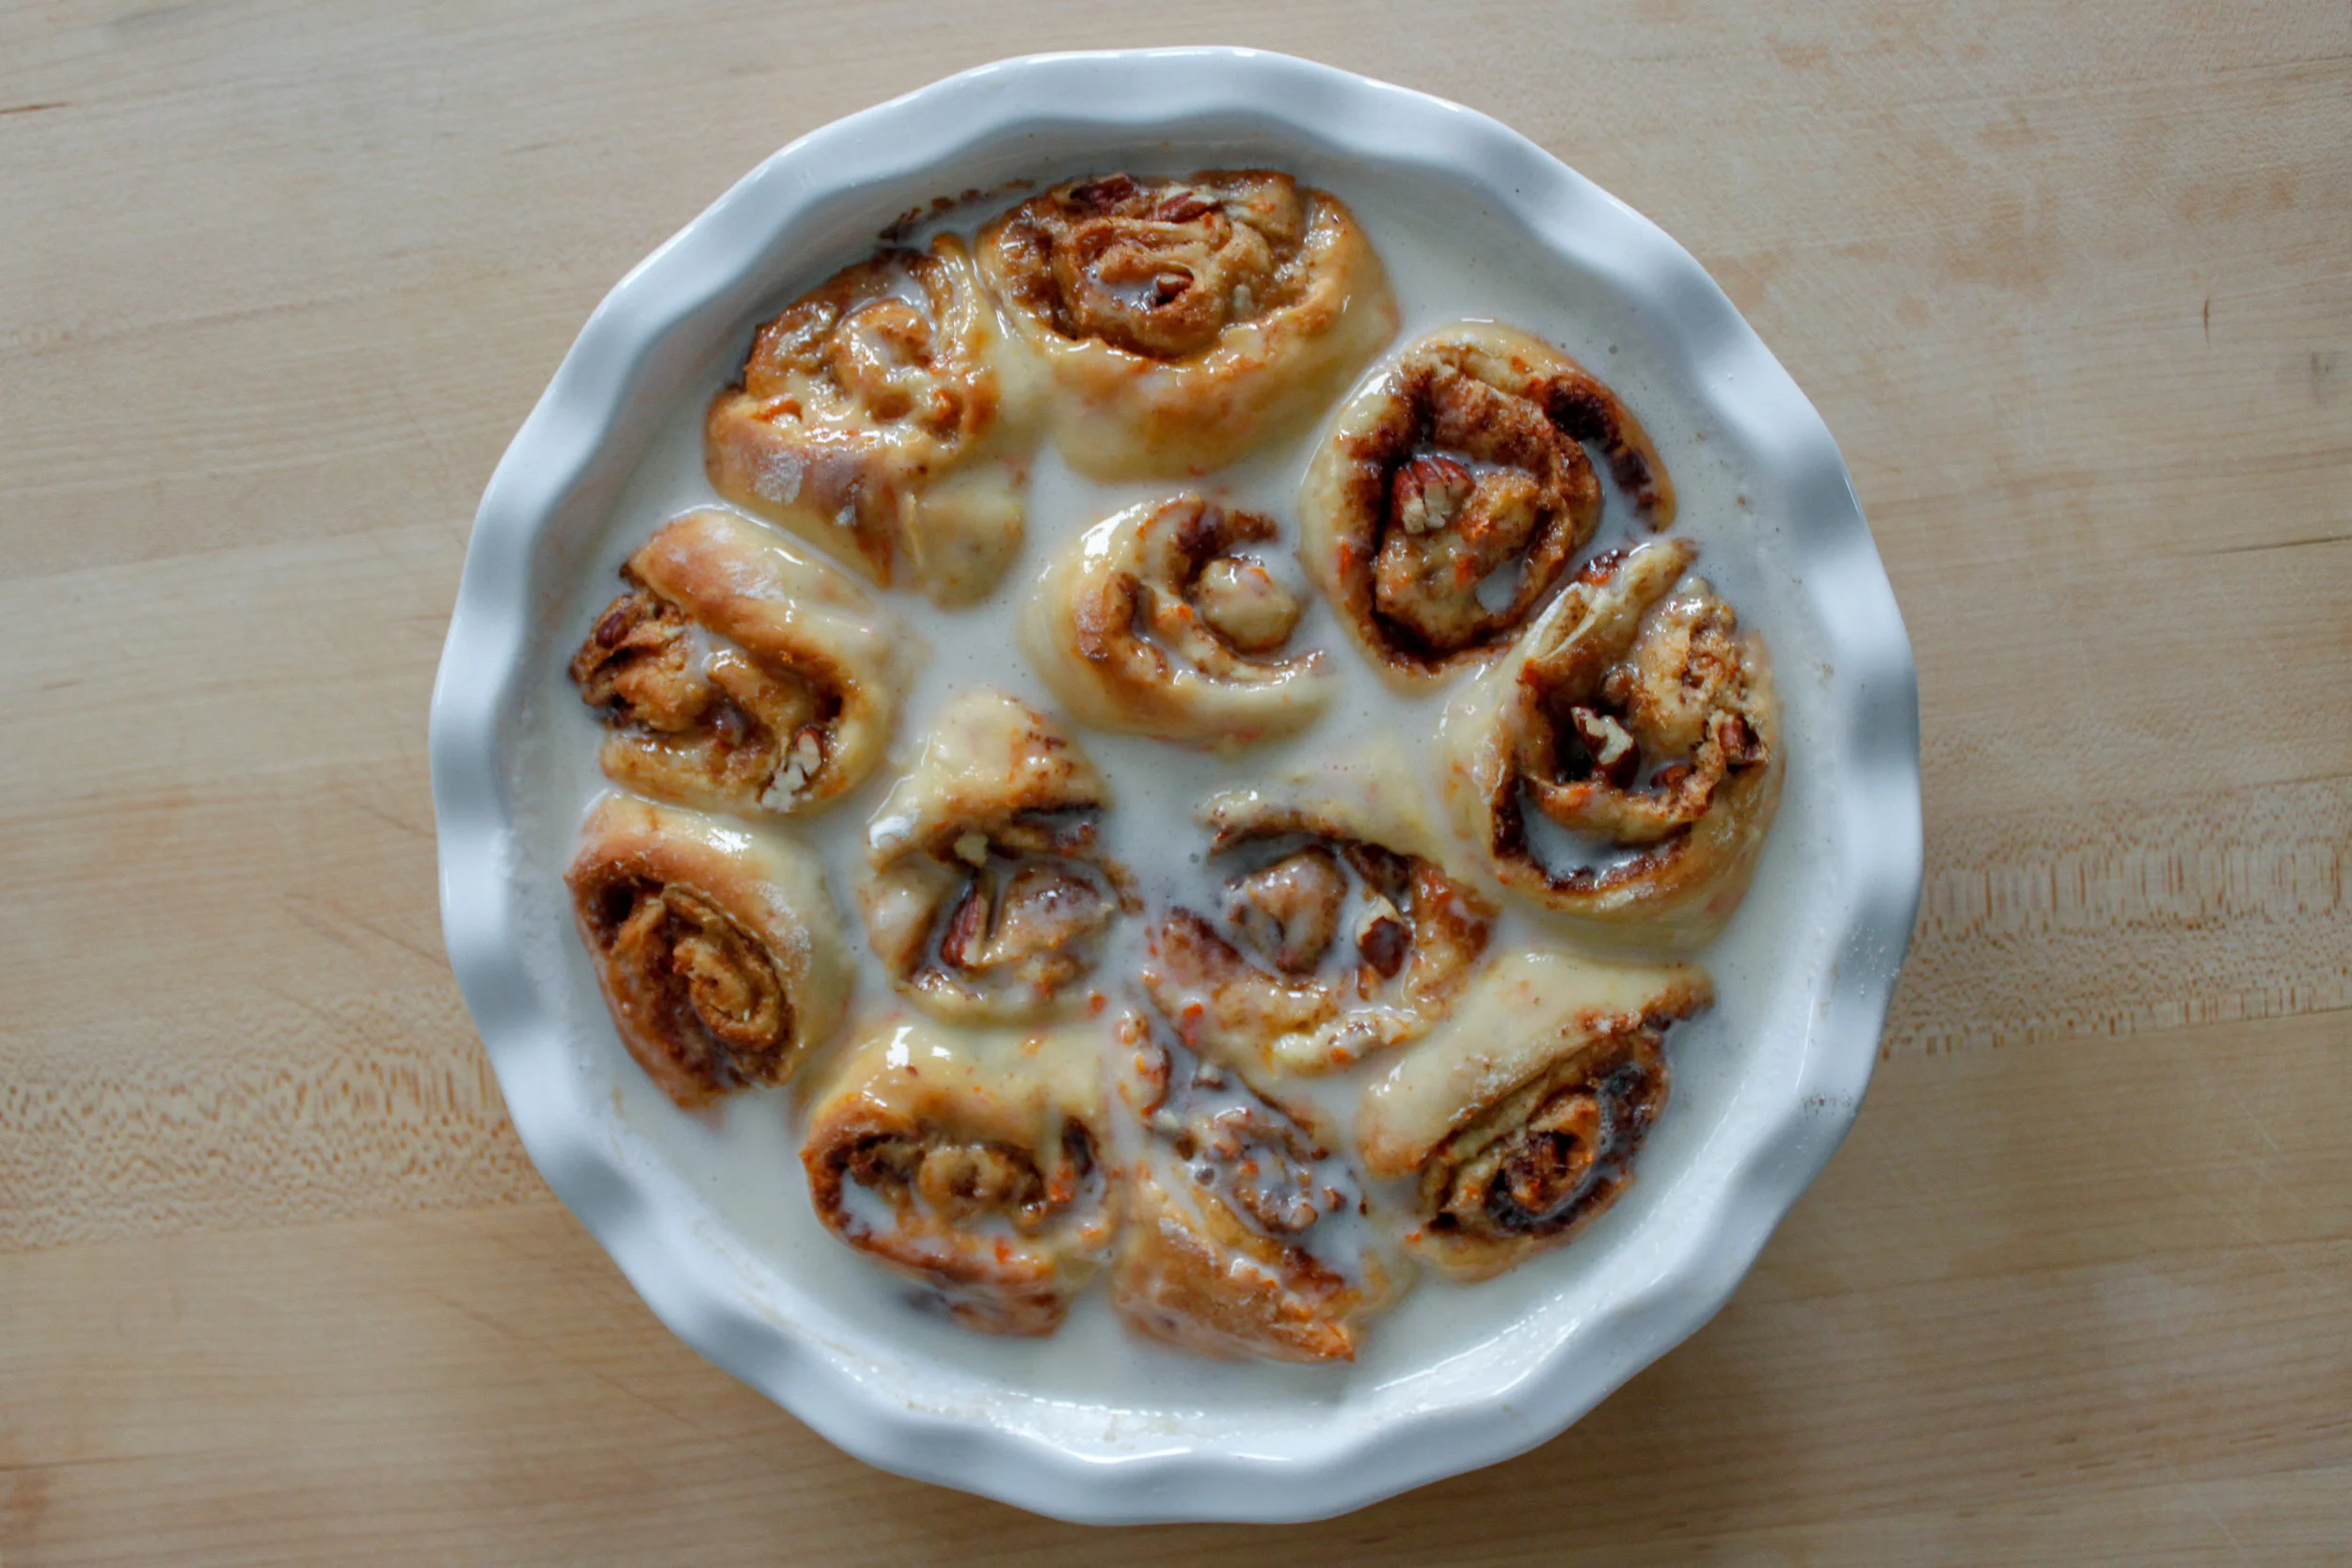
-Starting from the far edge, slowly roll the dough into a log (lengthwise). I like to use my fingers in a typewriter fashion here, moving from one end of the log to the other. Cut the log into 12 equal rolls using a bench scraper, then place in the pie dish cut side up. It’s okay if it’s not perfect! You’re covering it with icing later! And no one on this good earth has ever been mad about an ugly cinnamon roll once it goes in their face, I promise.

-Repeat with the other half of the dough, and allow both trays to sit on the stove for a second proof while you preheat the oven to 375.

-Bake for 20-22 minutes, until golden brown.

-While the rolls are baking, whisk together all the ingredients for the frosting until it’s pourable, adjusting the confectioners sugar and milk as needed to get it to your desired texture.

-Pour the frosting onto the rolls immediately after they come out of the oven- these are fantastic hot or at room temperature, we ate them for every meal for an entire day!!

YAY! YOU DID IT! NOW YOU GET TO EAT SOME BUNNNNNSSS TO CELEBRATE!

Deep Dark Fudge Brownies (GF) by audrey gebhardt

Let's talk about babysitter slices for a minute.

_MG_7515.jpg

You know, the kind you take when you're babysitting and they have MUCH better snacks at their house than you do at yours.

I'm talking entenmanns fudge frosted cake.

Or like two day old glazed munchkins.

Capri Sun. Ugggghhhhhh. 

The best houses though are the ones with a tray of boxed brownies. Shiny and crinkled studded with chocolate chips. You would slice off millimeter by millimeter of those brownies so the parents wouldn't know that you ate all of their snacks, right?

_MG_7514.jpg

Now, as a functioning adult, I am totally aware of the fact that the parents would not give a hoot about whether or not I was eating their snacks. In fact, they probably would want me and my 15 year old metabolism to help them with that tray of brownies. But for whatever reason it felt like a scandalous secret to sneak slices of sugar after the kids went to bed, did it not? 

_MG_7509.jpg

These brownies are reminiscent of that simple add oil water and egg boxed mix you made when you were a kid except they're about a billion times fudgier and gooier and yummier. 

_MG_7511-2.jpg

Deep Dark Fudge Brownies
(this recipe is kind've in weight. Please don't hate me. I promise it makes a difference)

85g Gluten Free Flour
1/2 tsp baking powder
1/2 tsp salt
1 1/2 sticks unsalted butter
300g sugar
3 eggs
75g cocoa powder
1 TBSP vanilla (for real no joke)
4oz dark chocolate, chopped

Preheat the oven to 350 and line an 8" square pan with parchment paper.

Whisk together the flour, baking powder and salt and set aside.

In a different bowl, whisk together the eggs, cocoa and vanilla for about a minute until super smooth and glossy.

In a medium saucepan, melt the butter and sugar over medium low heat whisking constantly. Don't let it bubble! Keep it low until the sugar has dissolved! Rub a tiny bit between your fingers to see if it's smooth. 

Slowly stream the melted butter mixture into the egg/cocoa mixture while whisking constantly until combined and then whisk for another whole entire minute- this is what will give you that glossy cracky top! Fold in the dry ingredients juuuuuust until combined, tossing the chopped chocolate near the end and folding that in too!

Spread evenly into the parchment lined pan and bake for 25 minutes, until the center is just set and doesn't jiggle when you wiggle the pan.

Let cool in the pan or be impatient like me and dig in with a spoon and burn the roof of your mouth with melted chocolate, both ways are totally okay.

Let's go have some brownies about it, shall we?

xo
Audrey

Peach Apple Pie (V) by audrey gebhardt

Let's talk about making people feel special for a second. 

Vegan Peach Pie

The other day I was at the doctor for my annual when she asked me to hop on the scale.

I do not own a scale, I don't much care about the number and I don't really feel a need to obsess over it the way I did when I was 14. I care so much more about how I feel in my body and my clothes.

Anyway, I hopped on the scale and the doctor immediately looked at the number and subtracted two pounds and said, 'how do we feel about this number'. And I just couldn't get over her willingness to overlook science for how someone might feel. I thought it was the simplest thing ever that could make the majority of women standing naked on a scale feel so so good, that she's willing to record the weight as a lower number because at the end of the day those two pounds don't really matter. 

It got me thinking about where else could we make people feel special when it's not really expected- which got me thinking about injecting small kindness everywhere. I can't even tell you how many grocery store check-out clerks are astonished when I make eye contact and ask them how their day is and actually listen to the answer on the other end of that question. 

Palisade Peaches

Tiny things like when someone holds the top of the receipt for you when you sign it make me feel so human to human with other humans. And my faaaaavorite- when someone holds your hand in both of yours when you shake their hand for the first time. Omgggg that is the best way to make a person feel special.

How else can we make people feel special? What if you baked this pie and left it cooling in the windowsill and then invited your neighbor over for a slice and some tea this afternoon like it was 1956? Would that be so strange? Could it also be SO GOOD?!

Vegan Peach Pie

Peach Apple Pie (Vegan)

1 Olive Oil Pie Crust, divided in two

3 medium ripe peaches
3 medium apples (I used Gala because it's what I had, anything super crisp will do-- honey crisp, gala, green)
1 TBSP cornstarch
1/3 c sugar
1 tsp cinnamon
1/4 tsp nutmeg

1 TBSP almond milk
1 TBSP maple syrup

Prepare the crust, separate into two parts and wrap tightly before setting aside while you prepare the filling.

Cut the peaches in half, remove the pit and then cut each half into eighths lengthwise. Cut the apples into quarters, cut out the core and then cut each quarter into thirds. (You read that right. We are barbarically not going to peel these fruits because you won't event notice the peel after it's baked and you will do like a tenth of the work to make this pie.)

In a small bowl, stir together the cornstarch, cinnamon and nutmeg. 

In a large bowl, toss together the spice mixture with the cut fruit.

Preheat the oven to 375.

Roll out one half of the dough so it's 1/8" thick (about the thickness of a nickel) between two pieces of parchment. Peel away the top layer of parchment and use the bottom layer to help you flip the dough into the 10" pie plate.

Roll out the other half of the dough and if you plan on losing your mind and making yourself crazy cut it into 1/4" strips but if you want to stay sane just use it like a regular pie crust.

Top the crust with the fruit then top the fruit with the crust however you see fit! To make it look how I did there's a bunch of pinching and twisting and crust breaking and tears involved. To make it look like a regular pie, just run a fork around the edge of the pie to seal it all together.

In a small bowl, mix together the almond milk and maple syrup.

Bake at 375 for 30 minutes until the fruit just begins to bubble then remove from the oven and brush with the almond milk/maple syrup mixture. 

Bake for another 10 minutes until it's golden brown on top and let cool before serving! 

This pie is BOMB the next day after it's been in the fridge. Or maybe it's just me. I love cold pie. I love you!

xo
Audrey

Chocolate Peanut Butter Cake (V/GF) by audrey gebhardt

It wouldn't be fair to this dessert to call it a brownie. 

Vegan/Gluten Free Peanut Butter Cake

There are hundreds of health food junkies out there running around calling recipes similar to this 'Sweet Potato Brownies' but that's just not okay. 

Because a brownie- a brownie needs to be dense. A brownie feels like dead weight in your hands. It sticks to the roof of your mouth it's so fudgy. It has a crackly shiny top and just a 1" square is enough to satisfy.

That doesn't mean there's anything wrong with what this is- it's just simply not a brownie. It's a light, fluffy chocolate cake with a depth of flavor and ZERO DAIRY, GLUTEN or REFINED SUGAR! 

Are you kidding me? I wouldn't have believed it either. This cake is unbelievably decadent and moist and you won't even miss the sugar- I promise.

vegan gluten free peanut butter chocolate cake

Chocolate Peanut Butter Cake (vegan/gluten free)

1/2 c almond butter
1/2 c cooked sweet potato (from an actual baked sweet potato, not canned puree)
1 flax egg (1 TBSP flaxseed meal + 2.5 TBSP water)
6 TBSP maple syrup
1/4 c cocoa powder
2 tsp vanilla
1/2 tsp baking soda

1/2 c coconut manna
1/2 c creamy peanut butter
1 can full fat coconut milk, chilled overnight
1/2 tsp salt
2 TBSP maple syrup

Start by making the flax egg- in a small bowl combine the flaxseed meal and water and set aside for five minutes until it firms up.

Preheat the oven to 350 and line an 8x8" pan with parchment.

In a medium bowl, combine the almond butter and sweet potato with a fork or whisk until smooth and creamy. Whip in the flax egg and maple syrup until combined. Whisk in the cocoa powder, vanilla and baking soda. 

Pour the batter into the parchment lined baking pan, bake for 25-30 minutes until a toothpick inserted in center comes out clean.

Once the brownies have cooled completely in the pan, prepare the peanut butter frosting.

DO NOT SHAKE the can of coconut milk. Open the can and scrape the top into a small bowl, saving the transparent liquid in the fridge for smoothies at another time. Beat the coconut cream until it's light and fluffy like whipped cream. Set aside. 

In a medium bowl, beat the coconut manna with the peanut butter and maple syrup until completely combined. Fold in the whipped coconut cream until smooth and spread over cooled cake. 

Store cake in fridge until you're ready to serve. Prepare for people to propose to you when they take a bite. And then tell them it's made with all wholesome ingredients!

xo
Audrey

Watermelon Sherbet by audrey gebhardt

There are plenty of words in the English language that I avoid saying altogether. 

3-Ingredient Watermelon Sherbet

Having grown up in a very Italian area, I am distraught when I have to speak, "ricotta" aloud. 

Mozzarella is not a simple one either.

Don't even get me started on bruschetta.

The worst part is, I loved Italian class more than all of my others. I love love love the language and I know how to annunciate these things properly, I just know I'm opening myself up for unwarranted ridicule by doing so.

Sherbet fits in that category too. It's a word that sounds wrong no matter how it falls out of your mouth. The kind've word that when you order it at Friendly's, you just point to it on the menu to dodge the discomfort of saying it out loud to your server and everyone else around you. 

The best part about this being a blog and not a Youtube channel is that I get to share this magical recipe with you and none of us have to say the word. Which most definitely is not sher-bert.

I see you in your mid-summer glory, cubed melon sitting in the back of your fridge that's juuuuuuust starting to get a tiny bit slimy around the edges. Not slimy enough to throw out yet but also not crisp enough to eat right now. Let's do something about it, shall we? 

I made this with nothing but watermelon but I suspect it would work well with cantaloupe and honeydew as well, or perhaps a combination? MAYBE A MANGO?!

You don't even know it yet but you're like an hour away from the dreamiest creamiest fruitiest sherbet on the block.

3-Ingredient Watermelon Sherbet

Watermelon Sherbet
Makes 1 quart

~4-5 cups cubed watermelon, frozen solid (at least 1 hour)*
1 can sweetened condensed milk
1/4 tsp salt

*This is a rough estimate because we all have a different definition of cubed. My cubes are about 1". For me, this was 1/2 of a smallish watermelon (not a personal tiny one, a regular small one).

In a food processor, combine all three ingredients and process for about five minutes until all of the chunks and seeds have been swallowed up by the sea of pink. 

Freeze in an airtight container for about 3 hours before serving.

I served mine with cacao nibs and lime zest, reminiscent of the ever-nostalgic watermelon roll! 

xo
Audrey 

Meyer Lemon Blackberry Cake (GF) by audrey gebhardt

I started my first business when I was 14 without having ANY idea what I was getting myself into.

Gluten Free Lemon Blackberry Cake

It really all started when I was in 3rd grade, and I really REALLY wanted the book "A Smart Girl's Guide to Money" from the Scholastic Book Fair (best day of the year). I think this might've been the only time I ever once in my life heard the word 'no' from either of my parents (I am extremely lucky and I know it). It was the best no I could've ever gotten. My mom's reasoning was that she always bought me these books that I never read, and that if I really cared that much about this book I could take it out from the library and take notes on it. 

I ended up doing exactly that, filling out an entire spiral bound notebook that I titled, "I Wanna be an Entrepreneur" and that was it for me. I wrote business plans for everything from a birthday party business, to a craft summer camp that would be held in my backyard (I was planning on being the head counselor at eight years old), to babysitting services (again- I was 8).

Gluten Free Lemon Blackberry Cake

I am so grateful for that no, because without it I would not have read that book nearly as thoroughly as I had to when I was copying it down into my notebook. 

Fast forward to the end of 9th grade. I had been decorating cakes with my mom for a few years for various cousin's birthdays, communions and every holiday under the sun. I decided that I had gotten good enough at my craft that people were going to pay me for it! It can't be that hard, right? At the time it felt so simple, all I had to do was say, "hi, this is a thing I do and you can pay me for it". So I did what anyone would do in 2009 when they want to get paid for something, I created a blogspot website complete with prices and a few photos of my creations and Plays With Food went live. 

Meyer Lemon Blackberry Cake

I had the lemonade stand effect at first after handing out my first batch of business cards (actually business magnets) to everyone within a 1/2 mile radius of Wantagh High School. People ordered cupcakes and cakes from me because I was undeniably sweet as pie and it was cute that I started a business. Looking back at my work, it wasn't all that great and to be honest most of it was made from a box with canned frosting. It might've been full of processed sugar and strange stabilizing substances, but it was also full of passion and drive and effervescent love that only a kid can create when they are excited about something. 

I remember the first time someone told me I wasn't charging enough for what I was doing- I was handing Mrs. Harclerode her daughter's communion cake for 100 guests that I had charged her $60 for, which I felt pretty good about at the time! Holding three $20's feels like a lot when you're 16 and you seemingly made this money appear out of thin air by doing something you love! She took the cake from me and with the most genuine shock looked at me and said, 'you should be charing $200 for this cake!'. That's when I started taking myself seriously. I switched to scratch-baking almost immediately and realized that this was more than a fun thing I did for the heck of it. 

Here I am, nine years, thousands of cupcakes, countless wedding cakes, dozens of baby showers and first birthdays and Christmas pear tarts later- diving back into the catering world. I took a bit of time off to explore being a young twenty something, traveling alone and staying up until the sun came up and moving across the country. I took time off and realized that I miss it. I miss being part of everyone's celebrations. The happy days- the ones where people that love each other gather and eat and drink and be merry. 

Here I am in Denver, starting where I started almost a decade ago- a little less naive, a little more serious and a LOT more stoked to join your party. 

Let's have some cake about it, shall we?

Gluten Free Lemon Cake

Meyer Lemon Blackberry Cake (Gluten Free)
makes one 8" cake (enough for 8-10 guests)

3 c gluten-free flour
1.5 tsp xanthin gum
1/3 c cornstarch
3/4 tsp baking soda
1 TBSP baking powder
1/2 tsp salt
2 sticks (16 TBSP) butter, softened
zest of 2 meyer lemons (or regular lemons)
2 1/3 c sugar
6 egg whites + 1 whole egg
2 tsp vanilla
2 c buttermilk (or 2 c almond milk + 1 tsp white vinegar)

2 c fresh blackberries
juice of two meyer lemons (or regular lemons) ((use the lemons that you zested for the cake!))
1/4 c sugar
1 tsp cornstarch

2 sticks unsalted butter, softened
1 lb confectioner's sugar
1 tsp vanilla bean paste

Grease and flour three 8-inch cake pans, preheat the oven to 350.

In a medium bowl, whisk together the gf flour, xanthin gum, cornstarch, baking soda, baking powder and salt.

In the bowl of a mixer, combine the sugar and lemon zest. Rub together between your fingertips until the zest is evenly distributed and the sugar is fragrant. Beat the butter and sugar until light and fluffy, about 3 minutes. Beat in the egg whites, egg and vanilla, scraping down the sides of the bowl and beating until everything is totally combined (about 1-2 minutes more). 

Slowly stir in 1/3 of the flour mixture juuuuuust until combined. Now slowly add 1/2 of the buttermilk (or almond milk mixture) and stir just until combined. Repeat with 1/2 of the remaining flour mixture and the rest of the milk, finishing with the last of the flour mixture.

Distribute evenly between the three greased baking pans and bake at 350 for 25-30 minutes, until a toothpick inserted in the center comes out clean and the top springs back when lightly pressed into with a finger. Let cool in pans for no more than five minutes before turning out onto a cooling rack to cool completely.

While the cakes are cooling, make the blackberry filling! 
In a small saucepan, combine the blackberries, lemon juice and sugar. Bring to a simmer over a medium flame then lower the heat to low and keep bubbling for about ten minutes, until the berries start to break down (you can push a few of them against the edge of the pan with a fork to help them along but don't break them all up!). Whisk in the teaspoon of cornstarch then remove from the heat and allow to thicken. Let this cool allllllll the way down before assembling the cake or you will be a very sad baker.

Make the buttercream!
In the bowl of your stand mixer, slowly mix the softened butter and confectioner's sugar until it's all cohesive. Once there are no more bits of sugar flying around your kitchen, crank up the speed on the mixer to high and add the vanilla. Let that go- scraping the sides of the bowl once in a blue for about five minutes. I mean it, five minutes. You want this buttercream to be hella fluffy.

To assemble the cake:
Level any layers that need leveling. What I mean by that is, get eye level with your cakes on their cooling racks and if they have a huge dome you're gonna want to cut across the top to make them all even. 

Place a little dollop of buttercream on the center of the platter you are assembling the cake on, center the first cake on the platter. Using a piping bag, pipe about a 1/2 border of frosting around the top edge of the cake (almost like you're making a fence to hold the filling in, which you are). Pipe a small amount of frosting inside the fence you just made and spread it out evenly so the entire topside of the cake is frosted. Spoon about half of the blackberry mixture on top and spread that out evenly as well. Top with the next cake and repeat this whole process.

Now you should have a three-layer, unfrosted cake. Dollop about 3/4 c of frosting on top of the cake and start spreading out until you get to the edges, then spread along the edges to kind've seal the filling in. Here's where you get to have some fun with it. I kept the top of my cake extra frosted and took a spoon to add bits of the leftover filling to the cake as I was frosting it to create that streaky thing that you see. 

You are the artist. This is the cake that you get to be the boss of. Go ahead! Tag me on instagram if you make this one @audreygebhardt, I'd love to see what you come up with!

xo
Audrey