I’m starting a new series on here called “Ballin’ on a Budget”. The idea came to me this week when I was evaluating my finances and budget for 2019. I realized that my boyfriend and I are really good at feeding ourselves delicious meals without spending too much money. We prioritize food over a lot of things, and by making most of our food from scratch we’re able to afford high quality ingredients and make restaurant quality meals for a fraction of the price.

While I won’t break down these meals into dollars and cents since we all shop at different grocery stores, I will give you an idea and try to keep these meals that you can feed an entire family with between $10-20 maximum.
Whatever your situation is, whether you’re paying off student loans or credit cards or saving for a house or wedding or baby, we can all agree that most of us would like to save a few bucks here and there, right?

This series is here to help you understand that broke doesn’t have to mean pb&j for every meal.
I thought nothing was more apt to start this series off with than my favorite food on the planet, NY style pizza. While Colorado has plenty of delicious brick oven Neapolitan style pies, sometimes you just need a big old cheesy NY slice. Foldable crust, tangy sauce, salty mozz, endless joy.

you bet your bottom dollar I folded that slice and took it straight to the face.
This recipe might look a bit wordy and daunting but trust me, it’s mostly little techniques that make this pie perfect. None of it is complicated, just make sure you read through the recipe once or twice before starting!
NY Style Pizza
recipe is for four 14” pizzas for LESS THAN $10 total! (I made all four on the same day and froze the slices of two of them wrapped in foil and then a big ziplock! Pop them in the toaster oven and they’re good as new!)
you will see that the dry ingredients are measured by weight. I highly suggest doing the same as the dough will be more accurate every time if you do that.
dough (recipe adapted from Feeling Foodish) \\ do this 1-3 days in advance
-6 C all-purpose flour (28oz)
-2 1/4 C water (about 95 degrees, think bathtub)
-1 tsp instant dry yeast (3.5 grams)
-2.5 tsp salt (15 grams)
-2 tsp sugar (8 grams)
-1 Tbsp olive oil
sauce
-28 oz canned tomato sauce
-1/4 C olive oil
-1 tsp dried basil
-1.5 tsp dried oregano
-1.5 tsp salt
-2 cloves fresh garlic
-pinch red pepper flakes
-1 tsp red wine vinegar
other
-16 oz low moisture full fat mozzarella
-1/4 c cornmeal
MAKE THE DOUGH:
Place water in a large mixing bowl.
In a separate bowl, whisk together flour, salt, sugar & yeast.
Stir flour mixture into the water until all of the flour is wet, add oil after and knead on a floured surface for about 5 minutes until you have a smooth dough ball.
Divide dough into four equal pieces and place each dough ball into a well oiled gallon ziplock or quart container. Immediately place in fridge and allow to hang out for at least 24 hours and up to 4 full days. I made pizza on a 24 hour crust and again on a 72 hour crust and the third day was the best one! This cold fermentation technique really allows the gluten to develop and creates a crust that is easily manipulated without ripping or tearing.
REGULAR PIE
If you have a pizza stone, place it on the top rack of the oven about 6-8” from the top. This creates that short oven type heat that you would get in a standard pizza oven! If you don’t have a pizza stone don’t fret! You can use a baking sheet flipped over so you have a flat surface to bake the pizza on.
Preheat the oven to 500 degrees and let it preheat for about an hour while you prepare the pizzas.
Take the dough out of the fridge, you’ll want this to hang on the counter for about an hour as well to come to room temperature so it’s really easy to shape.
While the dough is hanging and the oven is heating, make the sauce. In a blender, combine all of the sauce ingredients (whole cloves of garlic!) and blitz for about a minute until it’s all combined. If you don’t have a blender, chop the garlic very fine and just stir everything together.
Grate the cheese and place the grated cheese back in the fridge until you’re ready for it.
After the dough has been out for an hour, let’s get making pizzas! To stretch the dough, DO NOT EVEN THINK ABOUT GETTING A ROLLING PIN. If you’re new to this, DO NOT TRY AND THROW YOUR DOUGH. Dunk each side of the dough ball into flour and form into a disk on your counter. Starting from the middle, press the dough down and out working in a circle, leaving a 3/4-1” border that will be your crust. Homeboy has a pretty standard and simple technique here if you want to watch! If you have a pizza peel, dust it with cornmeal. If you don’t, dust a flipped over sheet pan with cornmeal. This is just a surface that you can build your pizza on and then slide it off easily onto the pizza stone when it’s done. Transfer your dough onto the cornmeal-dusted surface and give it a lil shimmy to make sure it will move off of the peel/pan.
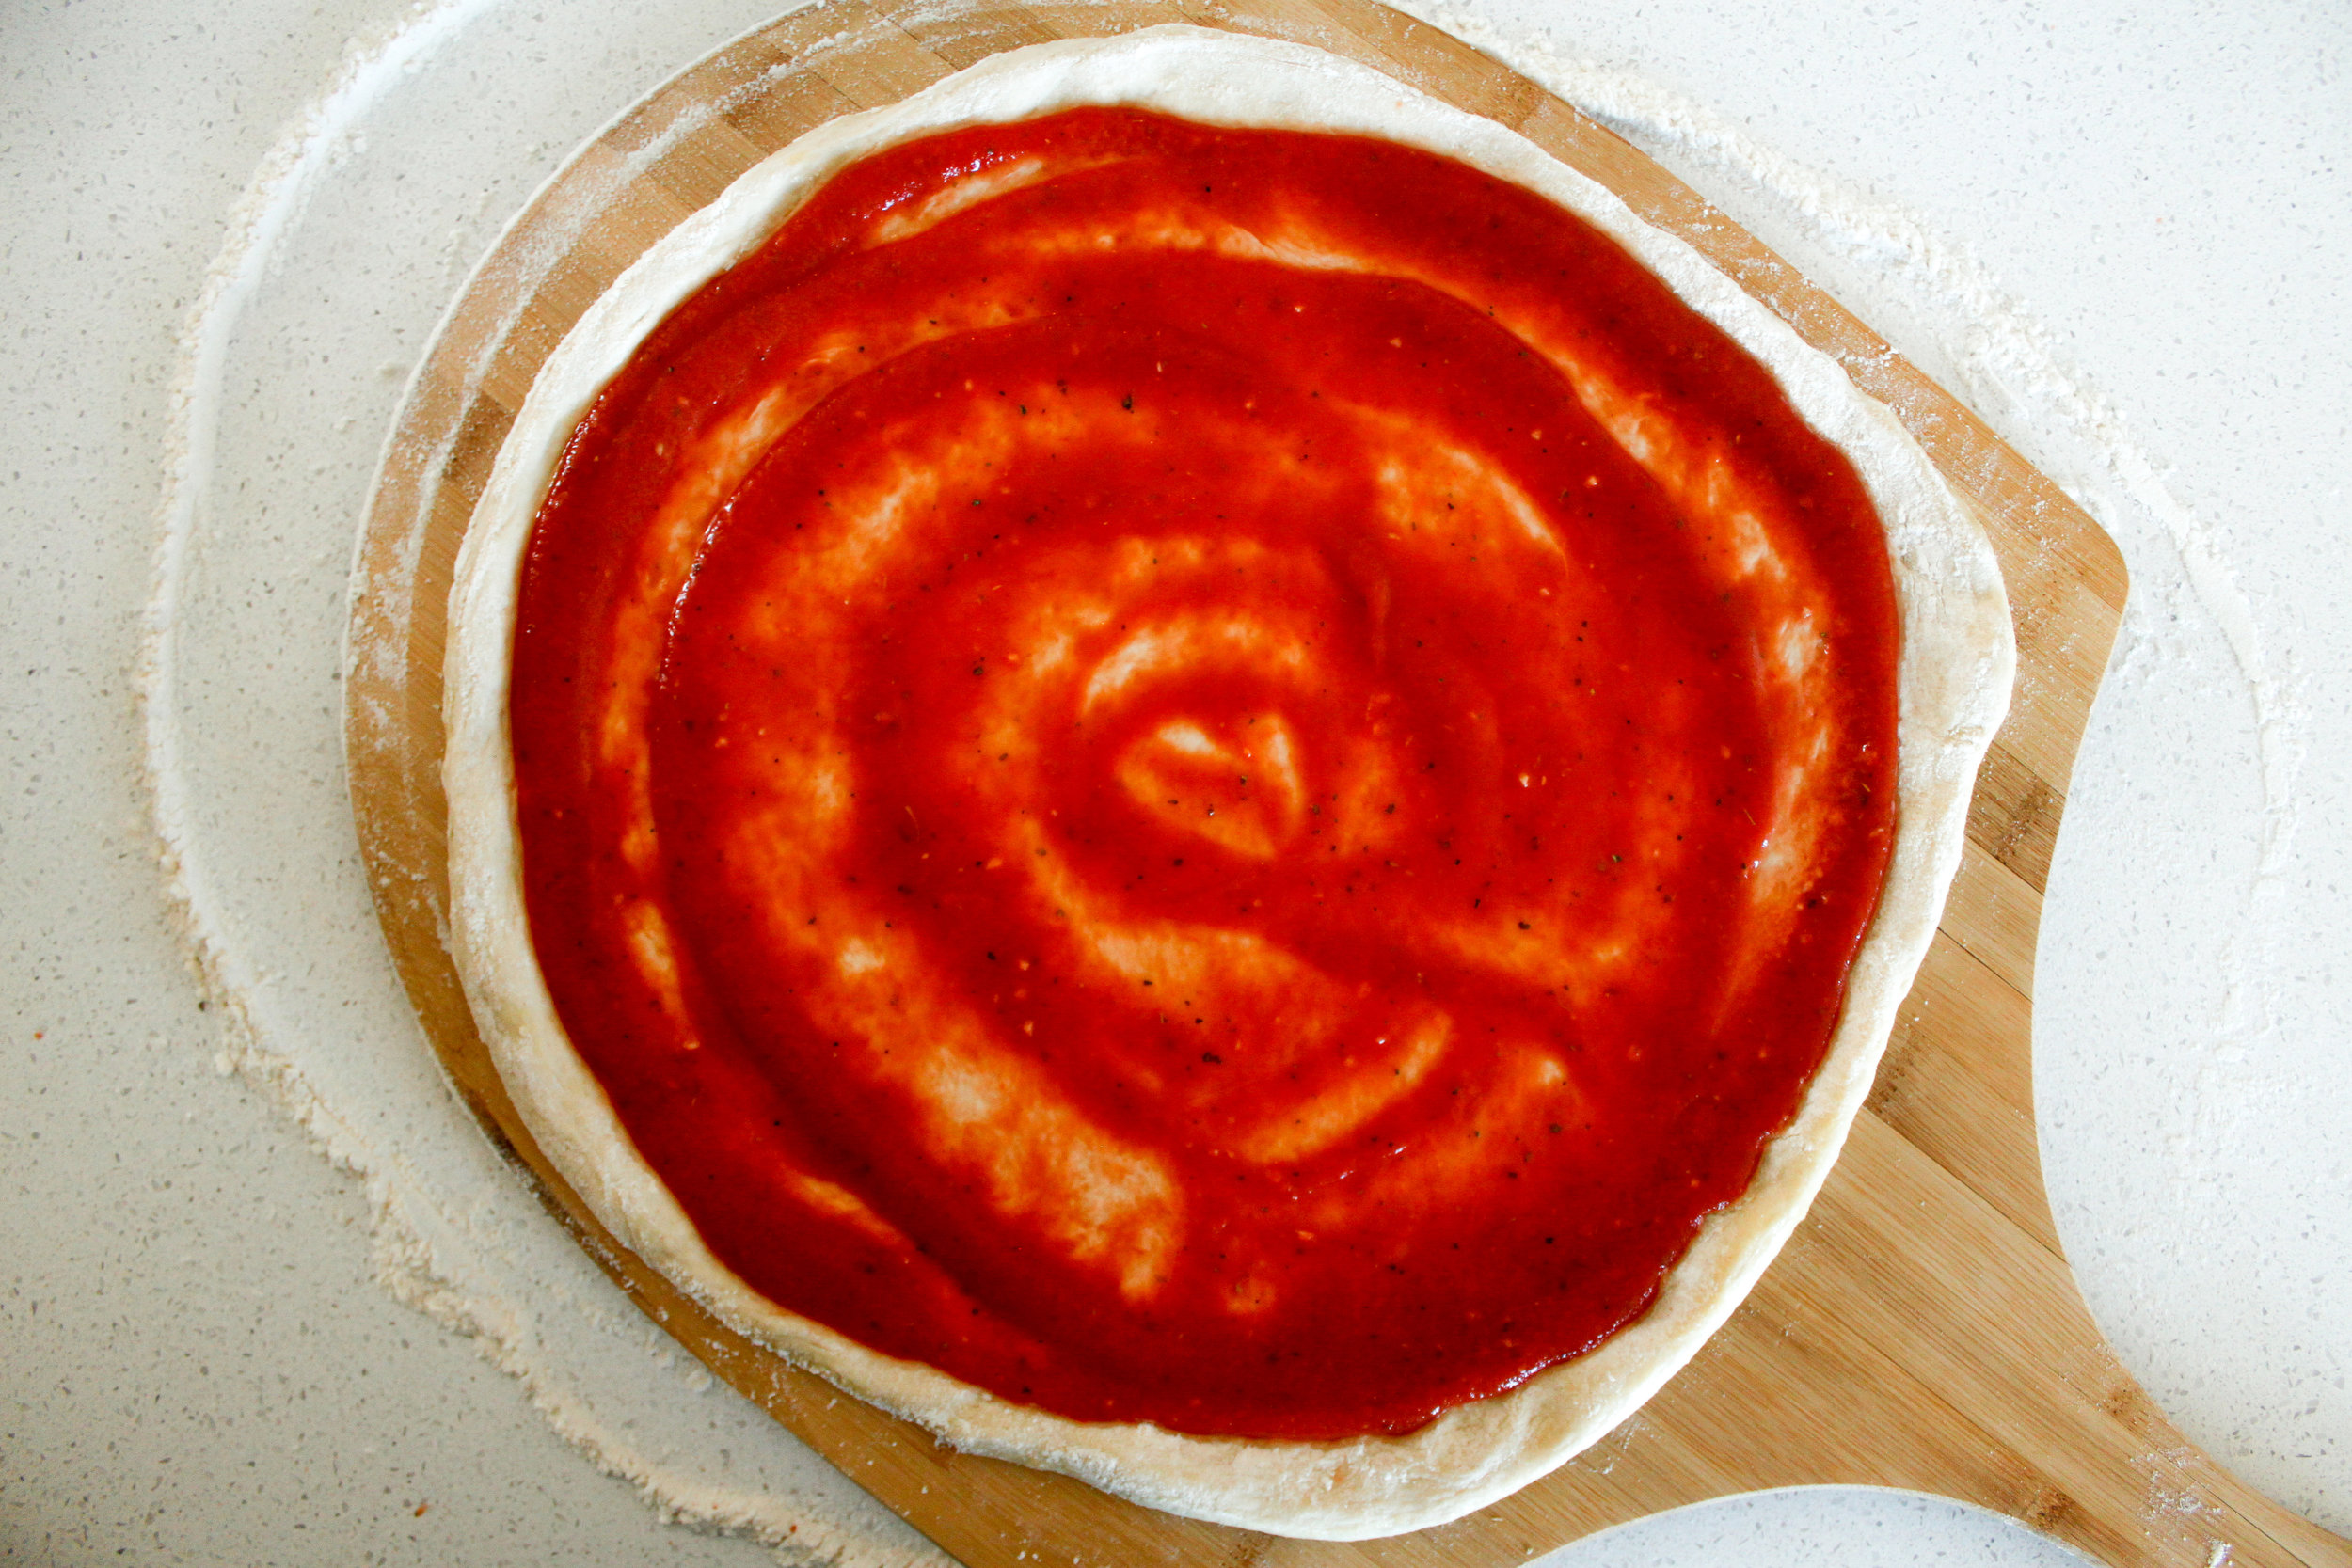
Ladle about 1/3 c of sauce onto the center of your dough and using the back of the ladle, swirl it around on the dough so it’s pretty uniform, you want it to look similar to the photo above. I like a pretty heavily sauced pizza and this was the perfect amount for me.
Now is when you add your cheese. Again- you don’t need to overdo it on the cheese. I promise you less is more. use 1/4 lb of grated mozzarella and evenly distribute it over your pie.
Slide your pie off of the peel/sheet onto the stone/sheet and keep the oven light on. It should take about ten minutes for the pie to cook but keep an eye on it! (It’s also just super fun to watch the bubbles grow). When you’re ready to take the pizza out, slide the peel back under it or use a spatula to help get it back onto the back of the sheet pan and immediately put it on the counter or cutting board. Give it a minute or so to rest before cutting it into eight, fold that slice in half and go to town.

GRANDMA PIE (if you want to switch it up, make one or two of the doughs a grandma pie. This is a classic Brooklyn/Long Island slice. Extra garlicy, crispy oiled crust, sauce on top.)
Grate another clove or two of garlic into the sauce. Press the crust into a well oiled 9x13 pan, pressing it all the way out to the edges. Top the crust directly with the same amount of cheese you’d use for a normal pie and then spoon the sauce all over the top of it. Bake this pie in the bottom 1/3 of the preheated 500 degree oven until the edges begin to brown and the cheese is bubbling up through the sauce and impress all of your friends with your authentic cultured slice when they come over for a pizza party. Should be in the oven for a bit longer than 10 minutes but again, you’ll want to keep an eye on it.
xo
Audrey