Pretty Things for When You're Bored by audrey gebhardt

Happy one week until daylight savings, friends! It’s basically my favorite holiday, the one that gives us an hour more sunlight. This weekend I’m making crumb cake and having a sloooooow snowy Sunday morning. Here’s some pretty things for your eyes this week!

8064ED41-0F77-4E1D-9DF6-6B9787351912.jpg

Ballin' on a Budget: Three Ingredient Tomato Sauce by audrey gebhardt

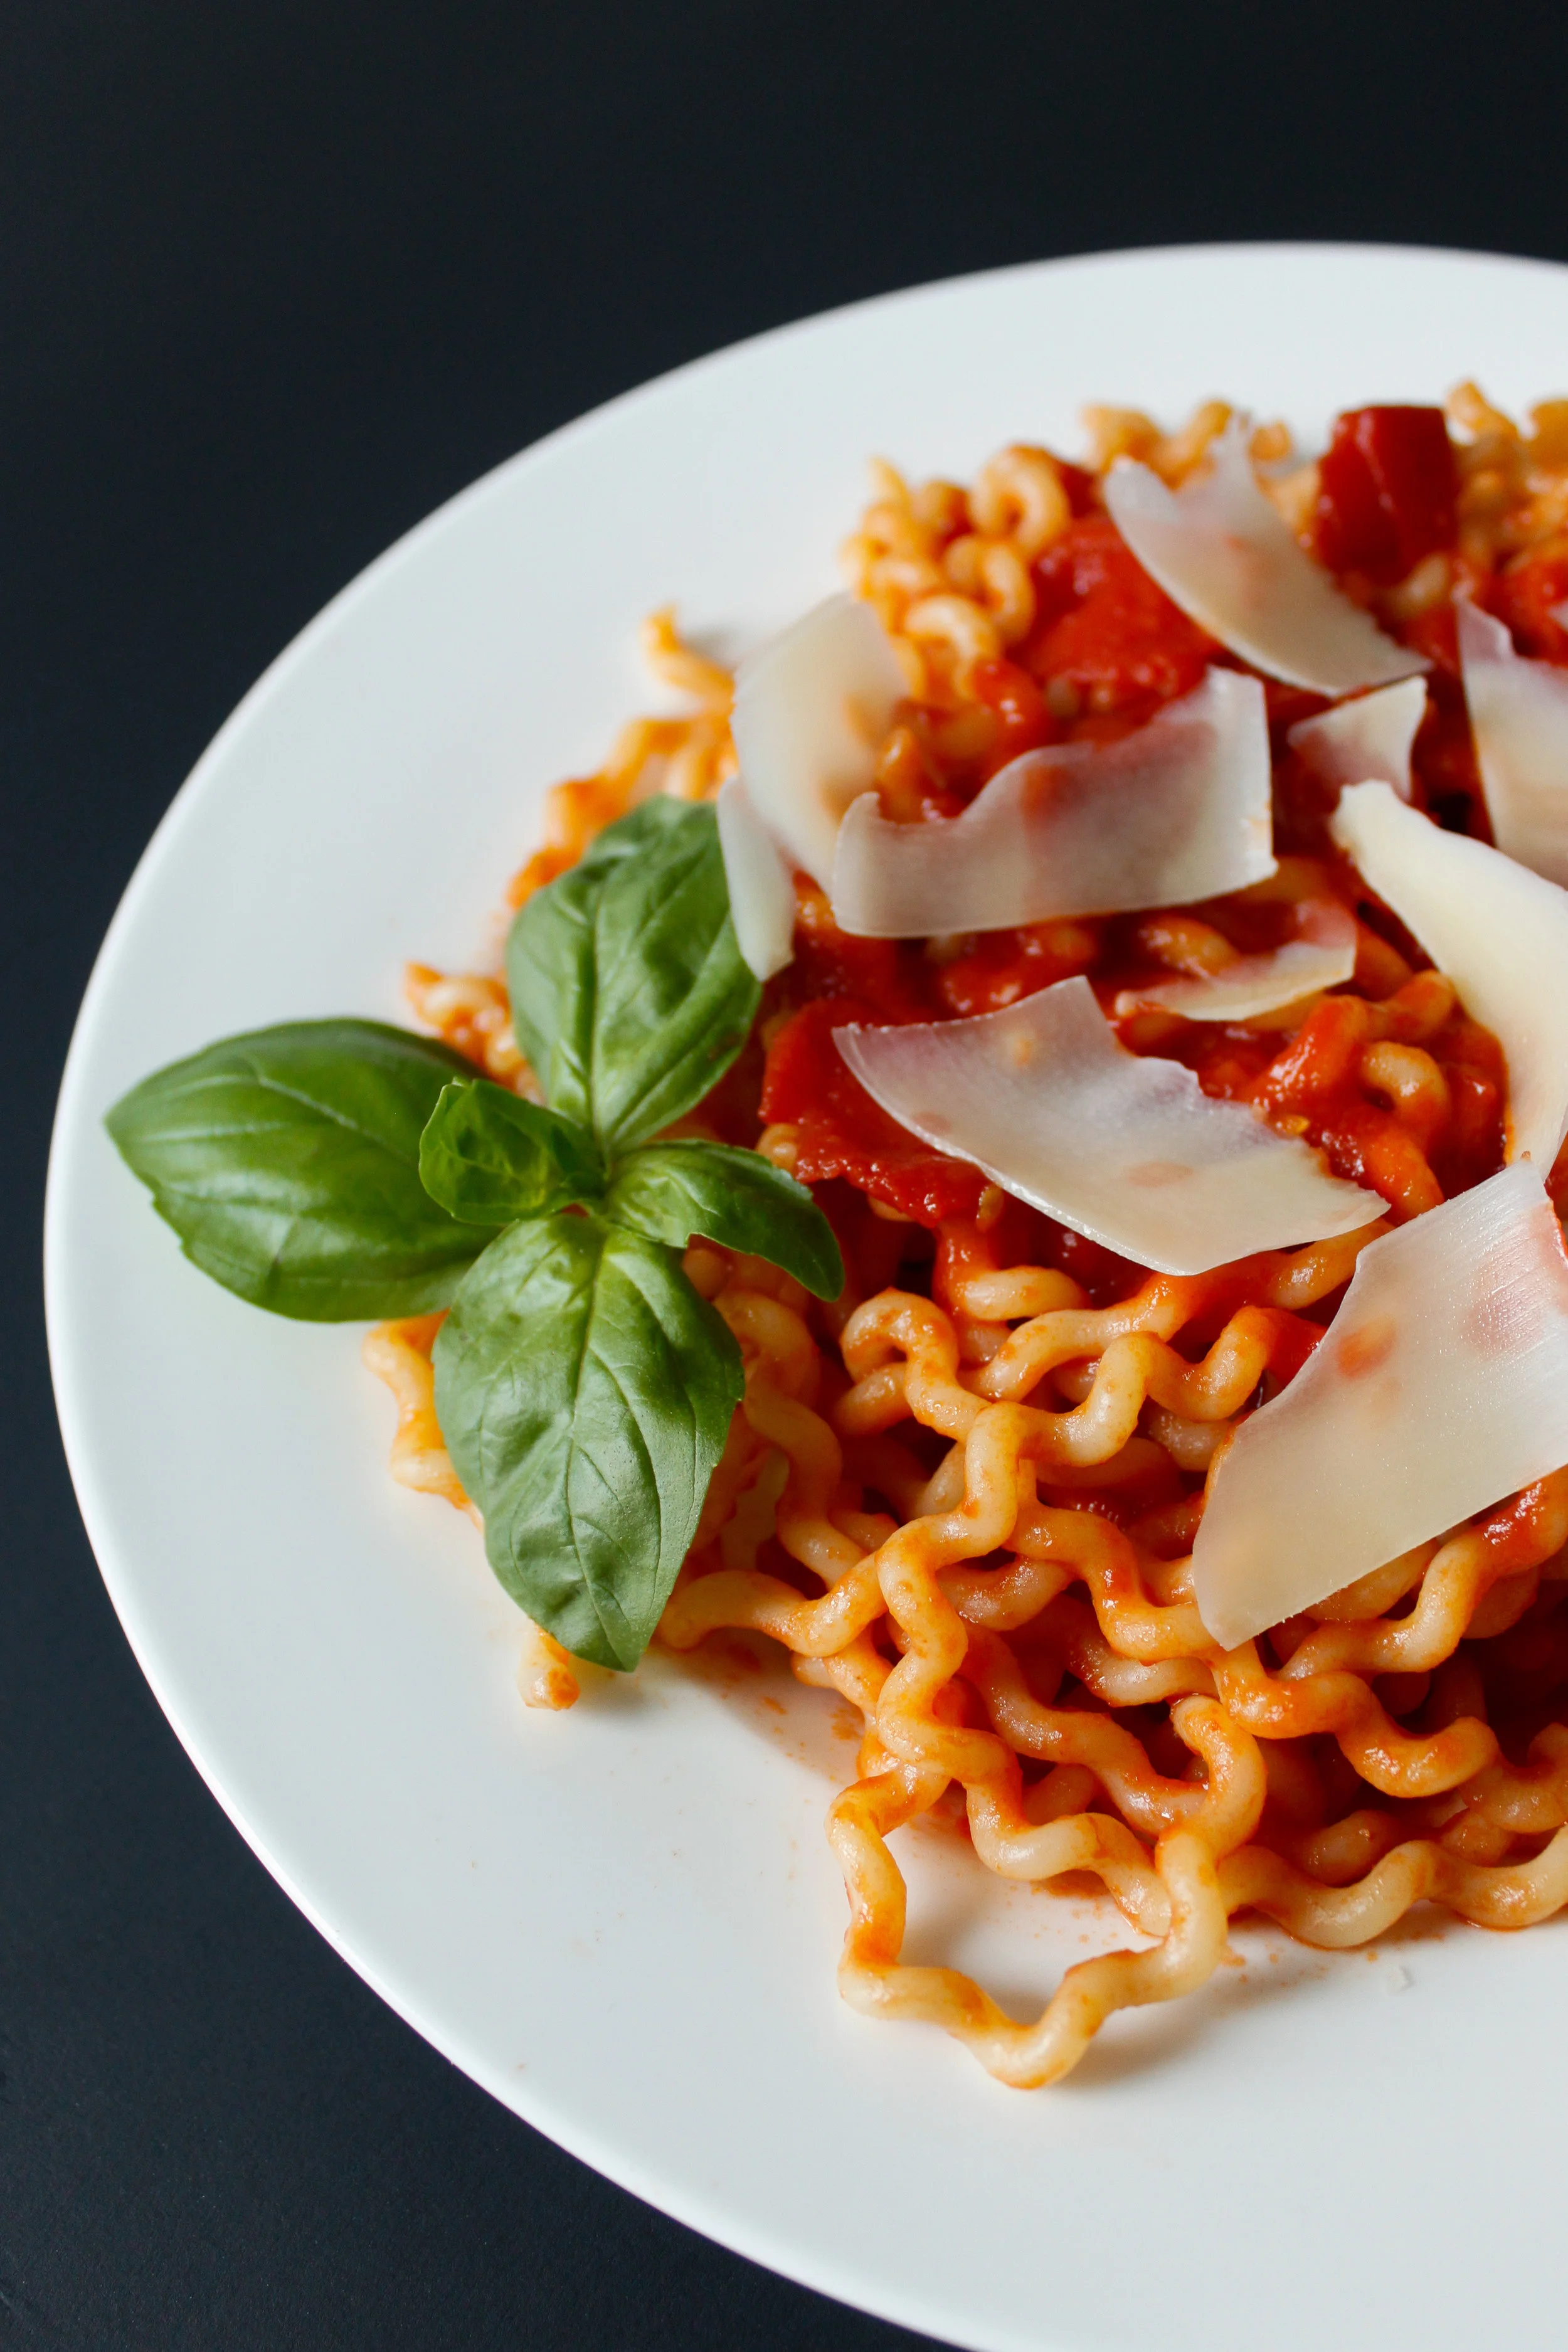
Homies. This recipe is truly a magic trick. You turn a can of tomatoes, a half a stick of butter & half of an onion into the richest, dreamiest pasta sauce you’ve ever had. YOU DON’T EVEN HAVE TO CHOP ANYTHING! All there is to it is to open a can and combine all of the ingredients in a pan- let them simmer away for 45 minutes and you.are.in.bidnezzzzz.

Three Ingredient Tomato Sauce

The key here is to use niiiiice canned tomatoes. San Marzano are a non-negotiable here, as the quality of San Marzano tomatoes is what makes this sauce so simple and good. They are typically a few bucks more than your average mass produced canned tomatoes, but even with a pound of pasta this recipe comes together for way less than 10 bucks.

San Marzano tomatoes are much like Champagne in that they come from a specific region- San Marzano. They’re grown in the volcanic soil at the base of Mt. Vesuvius which somehow cuts the acidity. They also have thicker walls and fewer seeds than a traditional Roma tomato, which fills them with flavor. They are expertly cared for and picked at peak ripeness so you can be positive that every can of San Marzanos you pick up will be well, perfetto.

As always, you can check out the video for this recipe HERE on my IGTV!

(I can take no credit for this recipe as it is well well known and exploded the internet about 8 years ago- I’m just reminding you about it in case you’ve never heard of it!)

Three Ingredient Tomato Sauce

Three Ingredient Tomato Sauce
makes enough for 1 lb pasta

28 oz can San Marzano tomatoes, whole peeled
1/2 stick butter
1/2 medium onion

Place all of the ingredients in a large saucepan over medium-low heat and bring to a simmer (yes, leave the onion halved!). Allow to simmer for 45 minutes- after fifteen minutes, use the back of a spoon to press the tomatoes against the side of the pan to help them along in their breaking-down process.

Boil water in a large stockpot for the pasta and heavily salt it. I’m talking like three enormous pinches. Maybe four. Cook the pasta until al dente and add one ladle full of the starchy, salty water to the sauce just before tossing the pasta with the sauce to serve- this helps the sauce stick to the pasta! Top with shaved parmesan if you’re into that sorta thing!

xo,
Audrey

Ballin' on a Budget: Lemon Asparagus Risotto by audrey gebhardt

I moved away from the home I lived in my whole life a bit less than a year ago. Some things have felt like a huge adjustment (not having a beach, not having a dozen houses nearby I can walk into unannounced, not eating pizza four times a week).

One of the things that I didn’t think about when I moved was the crocuses. The tiny white flowers that would pop up through the frost right outside my front door! The little flowers that could! Like clockwork, they’d show up within the first few days of March every year, snow or sunshine.

They were like the lighthouse bringing us to shore. The microwave minute nearing an end. The last hour of a red eye flight. And I miss them! I miss their cute lil faces popping up to remind us that one day we’ll be barefoot again.

So today, in Colorado, I’m calling in the crocuses of home with this Lemon Asparagus Risotto. This creamy, bright, flavorful dish comes together in about 30 minutes and pops in your mouth with a zing. All of the flavors of spring with the comfort of a still needed warm bowl of food.

In this recipe you can absolutely swap out the asparagus for whatever dark leafy green you have on hand, or even broccoli if that’s what you have! Risotto is extremely forgiving so this is a very loose recipe.

Lemon Asparagus Risotto

Lemon Asparagus Risotto (vegan optional)
Makes enough for 4 as a side dish

1/3 c diced onion
1 bunch asparagus, chopped into 3/4-1” chunks
1 lemon
1 c arborio rice
4 c vegetable stock (room temperature or warmed up-not cold!)
1 c water
2 Tbsp olive oil
1/2 tsp salt
1 tsp fresh ground black pepper
1/2 c grated parmesan cheese (optional)
2 Tbsp butter (optional)

Toast the rice. In a large saucepan over a medium low flame, place the dry cup of arborio rice. Allow the rice to toast, moving around every so often so it doesn’t burn on one side. It will turn light brown and smell super nutty- remove from pan and place aside for now.

In the pan you just used, add the olive oil and onions over a medium flame. Sauté for about 5 minutes, until the onions are soft and translucent. Add the toasted rice and two cups of the vegetable stock. Bring to a simmer and allow to simmer, stirring occasionally until almost all of the liquid is absorbed.

When almost all of the liquid is absorbed, add another cup of stock and repeat the simmering process.

Repeat with the final cup of stock. At the end of this simmering point, the rice should be nearly finished cooking.

Add the cup of water and the chopped asparagus, cook for another five minutes until all of the liquid is absorbed and the asparagus is bright bright green.

Stir in the lemon zest, salt and pepper (and at this point you can add the parm + butter if you’re using them! It’s still creamy and delicious without it but that definitely adds an extra layer of flavor!).

Serve immediately.

xo,
Audrey

Ballin' on a Budget: Blood Orange Scones by audrey gebhardt

Friends, the time for too much pink food is right now. Blood oranges are making their way out of our lives for another ten months so LISTEN UP.

Blood Orange Scones

These Blood Orange Scones are seriously the best.scones.ever. I swear it. I’ve never tasted a better scone and I don’t expect to anytime soon.

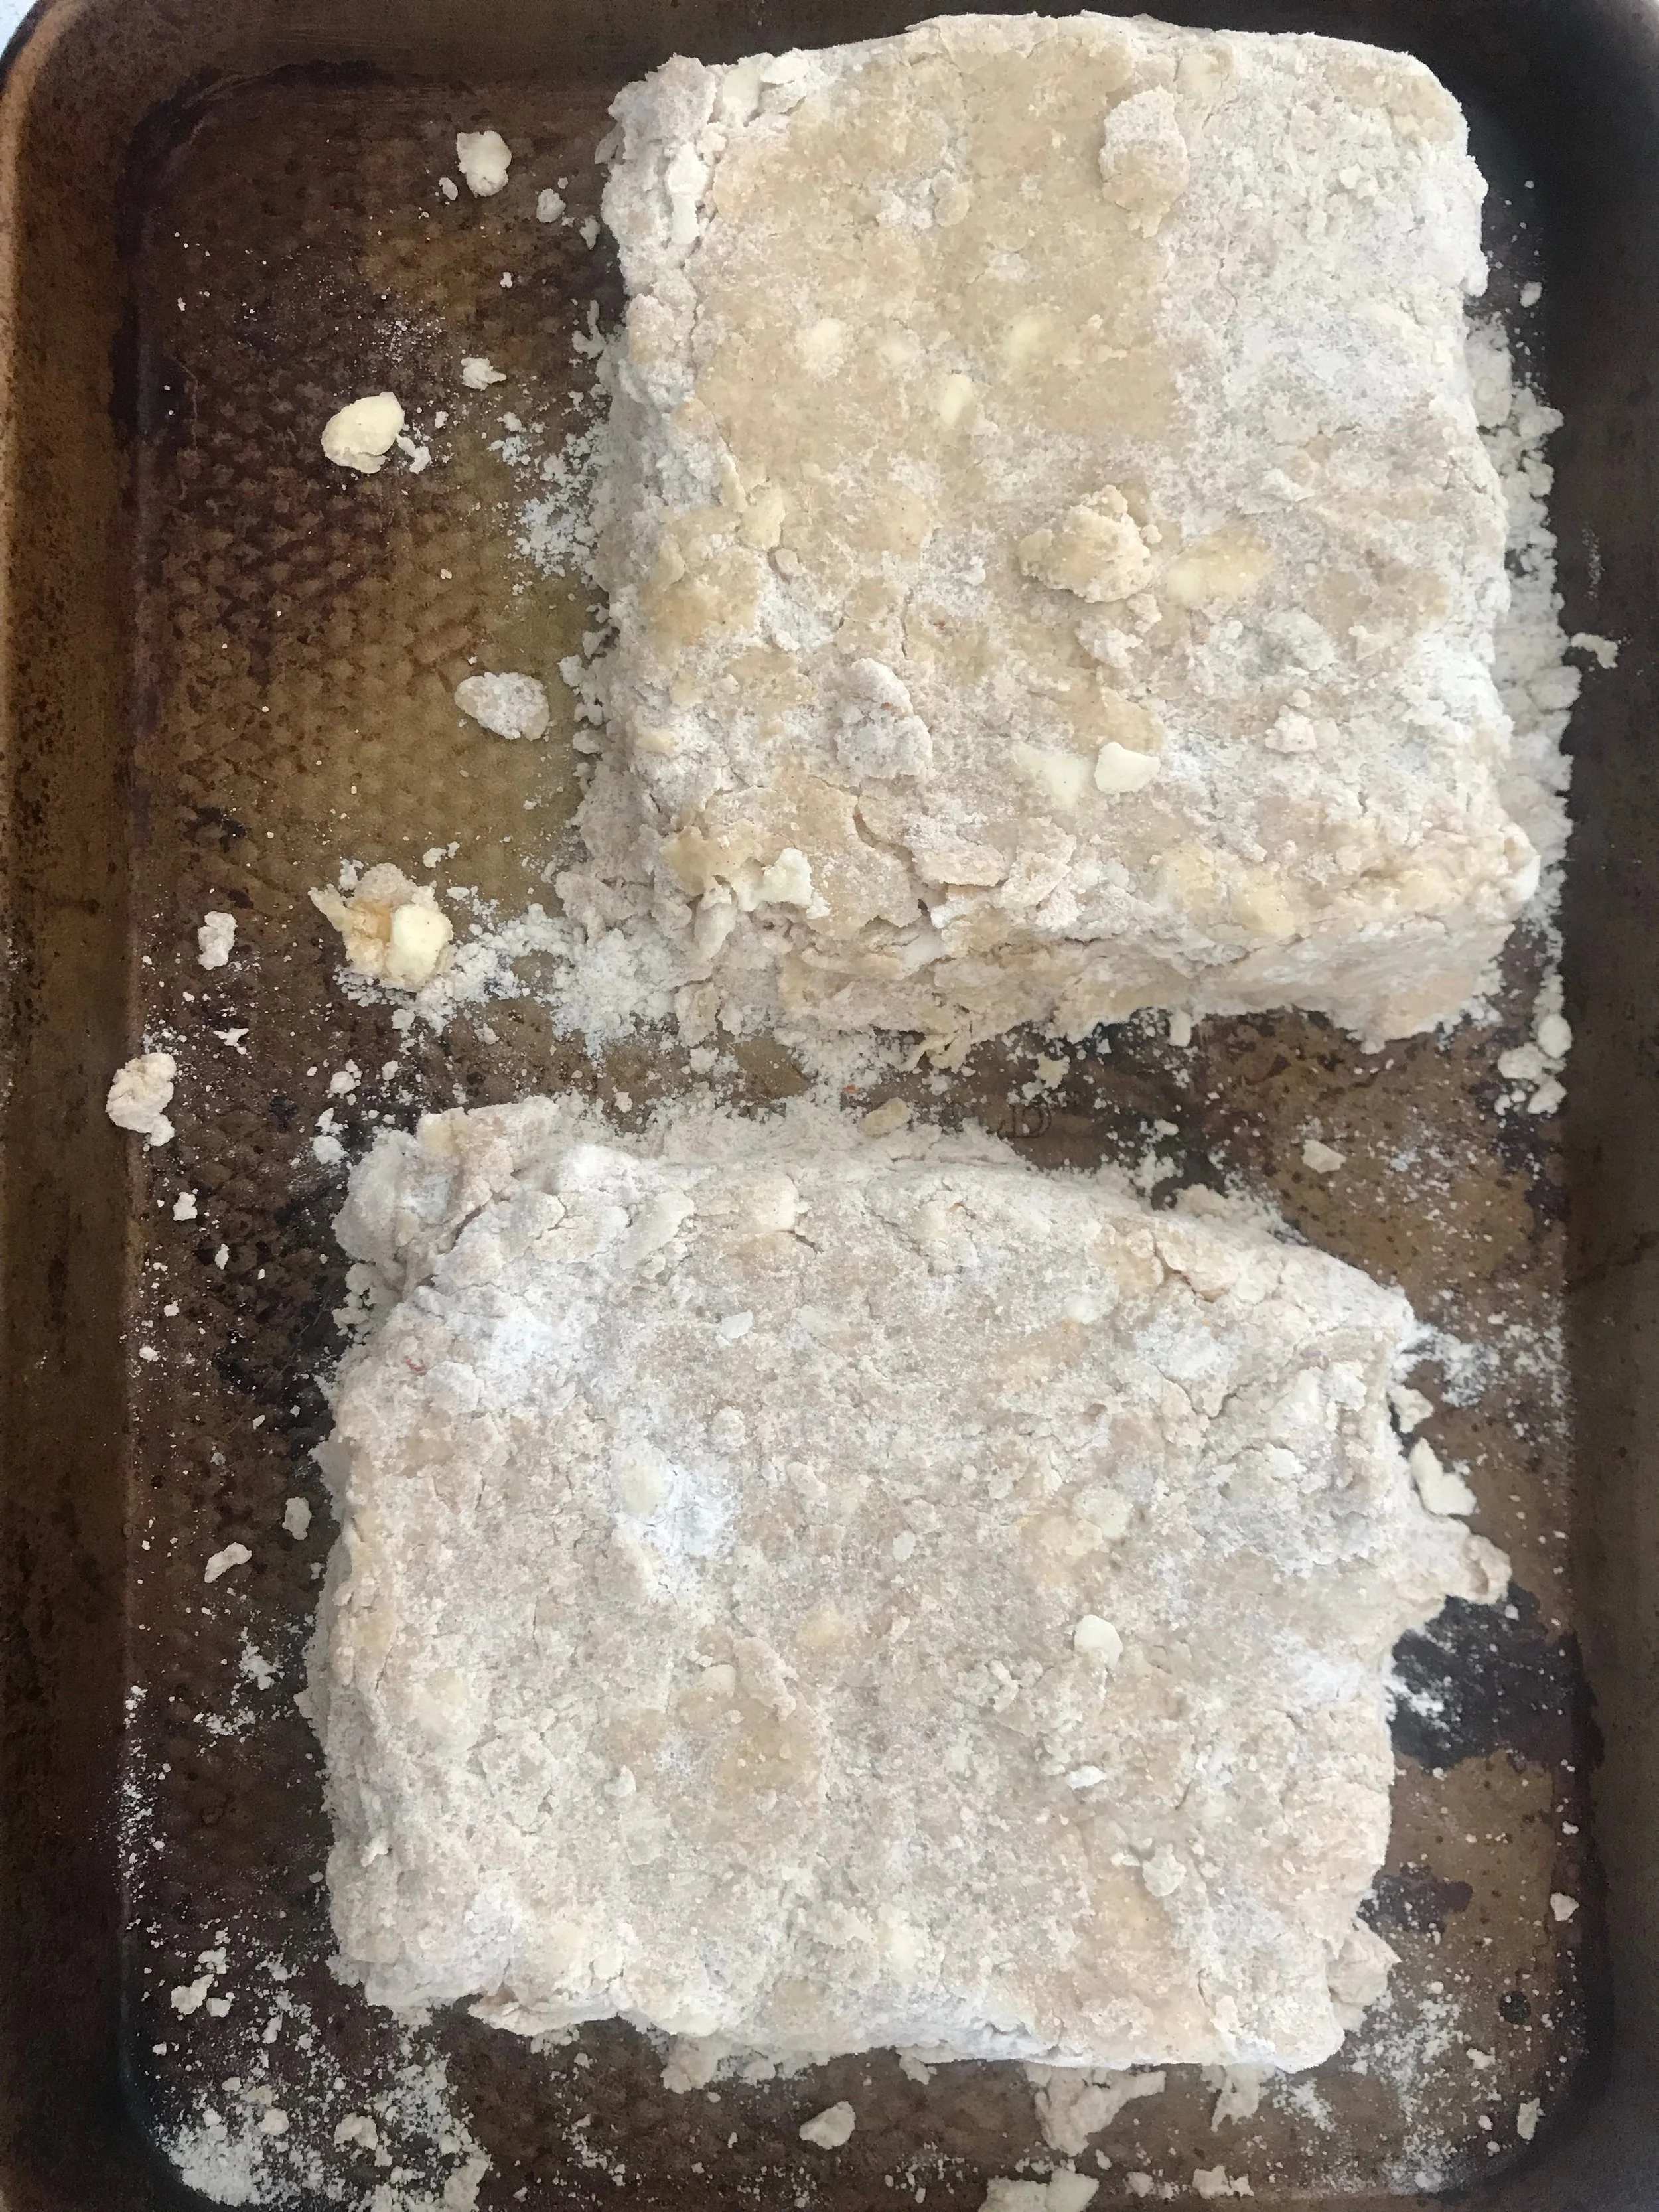
They may seem crumbly and fussy and frustrating but I promise you- THAT’S THE GOOD PART! The fact that these are falling apart before they even hit the oven is what makes them so so so tender and good. Feel free to swap out any kind’ve orange for the blood oranges in this recipe! You could even leave the citrus out altogether and turn these into plain cinnamon scones!

But omg. Please do yourself a favor and make these. They’re really simple, you can freeze the dough for up to a few months and have fresh hot scones ANY MORNING OF THE WEEK.

Get to it!

(As always you can watch the video tutorial over HERE on my IGTV!)

IMG_0694.jpeg

Blood Orange Scones
Makes 16

1 stick unsalted butter
zest of two blood oranges
2/3 c sugar
2 1/2 c + 2 TBSP flour
1 TBSP cornstarch
2 TBSP baking powder
1 tsp cinnamon
1/2 tsp salt
3/4 c heavy cream
1 egg

1 1/2 c powdered sugar
juice of 2-3 blood oranges

Cube the butter. Place in the freezer.

In a small bowl, zest the blood oranges over the sugar. Using your fingers, massage the zest into the sugar until everything is super fragrant and bright.

Combine the citrus sugar, flour, cornstarch, baking powder, cinnamon + salt in a large bowl, whisk to combine.

Take the cubed butter out of the freezer and using a pastry blender, fork or your hands, blend the butter into the flour mixture until the butter is the size of small peas and the mixture is pretty dry + crumbly.

Whisk the egg into the heavy cream then mix the egg/cream mixture into the flour/butter mixture GINGERLY. Be so so gentle and don’t over-mix or you won’t have flaky tender scones!

When the dough looks like it might want to start coming together, turn it out onto a lightly floured surface and form into a scraggly ball. Cut the ball into two pieces and kind’ve squish the dough together to form two separate 6” squares that are about 1” tall. Place the squares of dough on a baking sheet and place in the freezer for about an hour.

After an hour, preheat the oven to 400. Take the dough squares out of the freezer and cut each into four smaller squares, then cut each square into two triangles. (They might be falling apart at this point, fear not! just place the fallen parts of dough together to form a messy triangle on the parchment lined baking sheet to go into the oven and they’ll bake together! Some of these might look gnarly but they’ll taste SO SO good).

Place all of the triangles onto a parchment lined baking sheet and bake for 12-13 minutes, until the edges just start to turn golden brown.

While the scones are baking, combine the powdered sugar and orange juice and whisk until it’s a smooth, ‘pourable conditioner’ consistency.

Immediately glaze the scones when they come out of the oven.

Serve immediately or store in an airtight container for up to 4 days!

xo
Audrey


Pretty Things for When You're Bored by audrey gebhardt

My favorite blog posts are those that feed me content. The weekly roundups that show me the best stuff that people I admire are reading & looking at. I feel like we’re always hungry for more information, so every Sunday I’ll be sharing things I’m inspired by with you!

This week I’m going skiing for the second time and I’m SO STOKED. I’m also planning on continuing to burn candles at night instead of turning on too many lights as we get ready to say goodbye to winter nights (!!!)

image from my catering co, Sugar Mtn. Catering

image from my catering co, Sugar Mtn. Catering

Strawberry Nutella Hand Pies by audrey gebhardt

Honeypies, did you just open up instagram and realize that it’s Valentine’s day?

And you know that a bouquet of $19.99 roses from Stop & Shop probably won’t cut it?

Are you freaking out a little bit?

What if I told you that you can spend less than $15 on this recipe and crush the V-Day game in less than an hour with just a quick lil trip to your friendly neighborhood grocery store?

I’m not even kidding. You probably have one egg, you probably have sugar, you might even have cornstarch. All you need to get now is a bag of frozen strawberries, a pre-made pie crust (or you can make my super duper quick olive oil one!) and some nutella and you’ve got yourself a one way ticket to cupidtown.

As always you can check my IGTV here for a video tutorial of this recipe!

Strawberry Nutella Hand Pies

Strawberry Nutella Hand Pies
Makes about 6

two pie crusts for a 9” pie (store-bought or homemade)
12 oz bag of frozen strawberries
1/4 c sugar
2 Tbsp water
2 Tbsp cornstarch
6 tsp Nutella
1 egg
more sugar, for sprinkling

Preheat the oven to 400.

In a medium saucepan over a medium flame, combine the frozen strawberries, sugar + water. Bring to a bubble and let simmer for about ten minutes or so, until the strawberries start to soften and break down. Add cornstarch and break up the strawberries with a fork. Let this mixture simmer for another ten minutes or so until it thickens up.

Roll out the pie crust and cut 12 circles that are about 4” in diameter (I used a large ball jar lid to cut mine!)

Place 6 of the circles onto a parchment lined baking sheet. Scoop a teaspoon of nutella into the center of each crust circle, then top with a teaspoon of the strawberry mixture.

Make the egg wash- beat the egg with a tablespoon of water. Using your finger, lightly brush the egg wash onto the edges of each filled circle (around the fillings). Top each egg washed circle with a plain circle of dough and press down gently with your fingers. Press a fork down around the edges of each hand pie to seal the top and bottom circles of dough together.

Brush each hand pie with more egg wash then sprinkle with sugar.

Bake for 12-15 minutes, until golden brown. Serve immediately or at room temperature!

xo,
Audrey

Blood Orange Pavlova by audrey gebhardt

Let’s talk about interactive food. Pavlova is one of my FAVORITE things to serve at a dinner party, because I get my guests to help me make it. I pre-make the meringue and the custard, and I pass the bowl of heavy cream around the table with a whisk until it’s whipped cream! I have very competitive friends and it often becomes a race of who’s arm gives out first.

Blood Orange Pavlova

This dessert is really special, always a showstopper and doesn’t leave your guests feeling weighed down by pounds of butter and flour.

The meringue can be made the day before, just leave it out on the counter uncovered. You can even make the custard the night before and leave it covered in the fridge!

As always, you can catch the video over HERE on my IGTV!

Blood Orange Pavlova

Blood Orange Pavlova
Serves 10-12

for the meringue:
5 egg whites
1 1/4 c sugar
1 tsp vanilla
1 pinch salt
1 1/2 Tbsp cornstarch
1 1/2 tsp white vinegar

for the custard:
4 1/2 c whole milk
5 egg yolks
1/3 c cornstarch
1 c sugar
1 tsp salt
zest of two blood oranges
1 tsp vanilla

for the garnish:
2 c whipped cream
1 tsp vanilla
juice of two blood oranges
slices of two blood oranges

Make the custard:
Heat 4 cups of milk in a large saucepan over a medium flame until bubbling just around the edges of the pan.

Whisk together the cornstarch, sugar and salt. Whisk in the egg yolks and the remaining 1/2 c of milk.

When the milk is hot, quickly whisk in five ladles of milk into the egg mixture. Once that has warmed the eggs up a bit, whisk the whole mixture back into the milk in the saucepan.

Put the pan over a medium flame and whisking constantly, bring to a boil. Boil, constantly whisking, for 3-4 minutes until the custard thickens.

Remove from heat and stir in the blood orange zest and vanilla.

Cover directly with saran wrap and place in the fridge for at least 4 hours to cool down.

Make the meringue:
While the custard is cooling, preheat the oven to 250 and beat the five egg whites to stiff peaks in a large bowl.

Slowly beat in the 1 1/4 c sugar along with the vanilla and pinch of salt. Continue to beat for five minutes or so until the sugar is nearly dissolved (if you rub a bit between your fingers it shouldn’t feel too gritty). The meringue should be really thick and shiny!

Fold in the cornstarch and vinegar and form into a 10” circle on a parchment lined baking sheet.

Bake at 250 for an hour to an hour and a half, until it’s no longer sticky. Turn the oven off and open the door slightly and allow the entire thing to cool completely while it’s still in the oven.

To assemble:
Whip the very cold whipped cream until soft peaks form, then fold in the orange juice and vanilla.

Carefully place the meringue onto a large plate. Top with half of the custard and all of the whipped cream, garnish with blood orange slices.

I like to serve this in the middle of the table and just hand everybody their own fork!

xo
Audrey

Vegan Chocolate Lava Cakes by audrey gebhardt

Happy Valentine’s week, friends!

Vegan Chocolate Lava Cakes

How do you speak in love?

Is it physically- with kisses & hugs & shoulder rubs & back scratches?

Is it with words- like songs & poems & love letters & good morning texts?

Is it through service- like unloading the dishwasher & changing the sheets & taking out the garbage?

I speak love with food. Like piles of pasta with too much cheese for my friends & warm chocolate chip cookies for someone who’s aching & cups of coffee for the one I love most in the morning & melting chocolate lava cakes for everyone.

These lava cakes are ridiculous. They come together in under 30 minutes, they’re vegan (so no worries about under-baked batter + salmonella!) and they’re SO DELICIOUS.

Get after it, loves. (And don’t forget to check back every day this week for more lovey desserts!)

As always you can watch a tutorial video on my IGTV over here!

Vegan Chocolate Lava Cakes

Vegan Chocolate Lava Cakes
makes 11-12

3/4 c room temperature almond milk
1 tsp apple cider or white vinegar
2/3 c bittersweet chocolate chips (4oz)
3 Tbsp coconut oil
3/4 c applesauce or dairy free yogurt
1/3 c cocoa powder
3/4 tsp baking powder
1 tsp salt
1 tsp espresso powder
1/2 c packed brown sugar
scant 1 c flour
6 squares dark chocolate, broken in half

Preheat the oven to 400. Lightly coconut oil a 12 cavity muffin tin + dust each one with cocoa powder. Set aside.

In a large bowl, combine the almond milk and vinegar- set aside for 3 minutes or so to thicken up.

In a microwave safe bowl, combine the chocolate chips + coconut oil and microwave for thirty seconds. Stir, then microwave for another 30 seconds until totally smooth.

Whisk the chocolate mixture into the almond milk mixture until combined. Add applesauce or dairy free yogurt and whisk again until smooth.

Add cocoa powder, baking powder, salt, and espresso powder and whisk until smooth.

Add brown sugar and whisk again until combined.

Gently fold in a scant cup of flour (just under 1 full cup) until no bits of flour remain in the batter.

Scoop 1/4 c of batter into each cavity of the muffin tin and press a rectangle of chocolate into each cake.

Bake for 8-10 minutes, until the outside is set and the center still wiggles.

Right when you remove the cakes from the oven, run a knife around the edge of each cake and then turn the whole pan out onto a flat surface (you don’t want to use a cooling rack because the filling will fall out of the middle and the cakes will collapse!)

Serve immediately, or refrigerate for up to 12 hours before microwaving for 30 seconds and serving.

xo
Audrey