Tiramisu Cabin by audrey gebhardt

You heard it here first folks, gingerbread houses are out and tiramisu cabins are in for 2024. An actually edible gorgeous dessert table centerpiece? Sign us up!

This tiramisu went wildly viral on instagram last week with over 9M views and here’s how to make it!

Ladyfingers can be tricky to find in stores (though Italian specialty markets will always have them!) I buy them on amazon here.

A long, wooden board makes a beautiful base for this cabin. You’ll notice the recipe calls for cream cheese instead of mascarpone- this is to make the filling more stable so the layers are easily stackable. I also don’t add raw eggs because I’m a food safety nut.

You can easily swap out the chai concentrate for baileys, kahlua or just a tablespoon of vanilla bean paste.

Make this up to 48 hours prior to your event but not longer than that!

Recipe (serves 12-16):

4 packages ladyfingers (you need ~100 total to account for breakage)
1lb cream cheese
1lb confectioners sugar
1/4 c chai concentrate (I love Dona)
16oz heavy cream
optional: zest of one orange
1/2c espresso
1/2c sugar
2c hot water

Whip cream to stiff peaks, set aside.

Whip together cream cheese and confectioners sugar until smooth, light and fluffy. Slowly add in chai concentrate and combine until smooth.

Fold whipped cream into cream cheese mixture, set aside.

Combine espresso, sugar and hot water and stir until sugar is dissolved.

Set out a platter that is at least 16x8”

One at a time, dip your ladyfingers QUICKLY (don’t. fully soak them or the house will not be stable) and line them up, long sides next to each other on your platter. The base of the cabin will be 12 ladyfingers wide.

Pipe filling over the top of the base of the cabin, about 1/2” thick. Repeat the dunking process with the ladyfingers but this time lay four ladyfingers at the edge of the rectangle in the opposite direction. You will have 3 rows of 4 ladyfingers. Top with more cream.

Repeat again, but with the original orientation of ladyfingers. Continue this process two more times, alternating the direction of the ladyfingers each time until your cabin is 5 ladyfinger layers tall (a total of 9 layers with 5 layers of ladyfingers and 4 layers of cream).

The next layer will will have cream piped just down the center and three rows of only two ladyfingers next to each other. Repeat again but with only one ladyfinger going down the center of the cabin.

For the roof, pipe the last of the cream over the top triangle of the ladyfinger and lay UNDUNKED ladyfingers on top, alternating which side has the long ladyfinger and which side has broken ones to create the gabled roof effect.

Allow to set in fridge for at least one hour before serving. Serve within 48 hours of preparation.

Things I Liked This Week vol. 3 by audrey gebhardt

\\ hahahah what is time anymore anyway. Some days go on forever and others are over in half a second, right?

\\ o b s e s s e d with Sarah Sherman Samuel’s second kitchen reveal! (you know I love a two kitchen house)

\\ love love love following along with my homegirl Cait’s “Maternity in Quarantine” photo series. Loving the BTS of how she’s doing it with just things in her house even more.

\\ I’m having a hard time not pulling the trigger on this pretty pour over kettle. Not a need, but kind’ve a need, you know?

\\ I also desperately want this gorgeous weighted blanket. We have a different one and Carl and I alternate who sleeps with it- so one of us gets an excellent night of sleep every night hahaha.

\\ We added a few people to our quaranteam this week and it feels a little weird but also GOOD. I had no idea the difference it makes to have small amounts of social interaction. Are you doing it? What’s the word?

\\ We’re planning a really fun photoshoot with Murphy and Camille tomorrow and I.CAN’T.WAIT!

Cherry-Berry Chamomile Shortcake by audrey gebhardt

As I mentioned previously, we are cake people now. This one is pretty special. It tastes like a mash up of my all time favorite (strawberry shortcake) and a shirley temple. The cherry syrup soaks into the almond scented cake and WOAH. I used this white cake recipe, but you could easily use a boxed mix with a tiny splash of almond extract added or even store bought pound cake or angel food cake!!

Cherry Berry Shortcake with Chamomile Cream

Cherry Berry Shortcake with Chamomile Cream
(makes one 2-layer, 8” cake)

White Cake (Or sub white cake mix + 1/2 tsp almond extract. Or store bought pound cake or angel food!)

Cherry Berry Syrup
1 c cherries, pitted and cut in half
3 cups assorted berries (I used strawberries and blackberries)
1/4 c sugar (or honey!)
Splash of OJ (Fresh squeezed or not)

Simmer all of these ingredients (stirring occasionally) for about 20 minutes, until the berries start to break down and a syrupy sauce is forming at the bottom of the pan.

Place in a covered container in the fridge and allow to cool completely, at least four hours.

Chamomile Whipped Cream
2 c heavy cream
2 chamomile tea bags
1 TBSP sugar (or honey!)
1.5 tsp vanilla bean paste (or extract)

In a saucepan, heat the cream until small bubbles just start to form around the edges (DO NOT ALLOW IT TO BOIL OR EVEN SIMMER!) Steep the tea bags in the cream for 7 minutes or so, then remove and chill the cream in the fridge while the cherry berry topping cools.

WHEN EVERYTHING IS COOL: Whisk or beat the cream until it starts to thicken up, then add the sugar and vanilla. Continue to whisk/beat until soft peaks form (don’t overbeat or you’ll have butter!!) This process goes much faster the colder your whisk/beaters/bowl are. I like to place all of them in the freezer for about 15 minutes before I start to make the whipped cream.

Place one of the cooled cakes on a plate and level if needed. Top with 1/2 of the whipped cream, building up the cream around the edges to create sort of a bowl to hold the cherry berry syrup. Top the cream with 1/3 of the syrup and then place the other cake on top and repeat the process. SOME SYRUP MIGHT OOZE OUT AND THAT’S OKAY! This is a messy, summertime, sitting in a wet bathing suit to eat this kind’ve cake!! I like to save the remaining 1/3 of the cherry berry syrup in the fridge and pour it into each individual slice to serve or have it with ice cream!!

Cherry Berry Shortcake with Chamomile Cream


DIY Harlequin Patio! by audrey gebhardt

This post is a DOOZY.

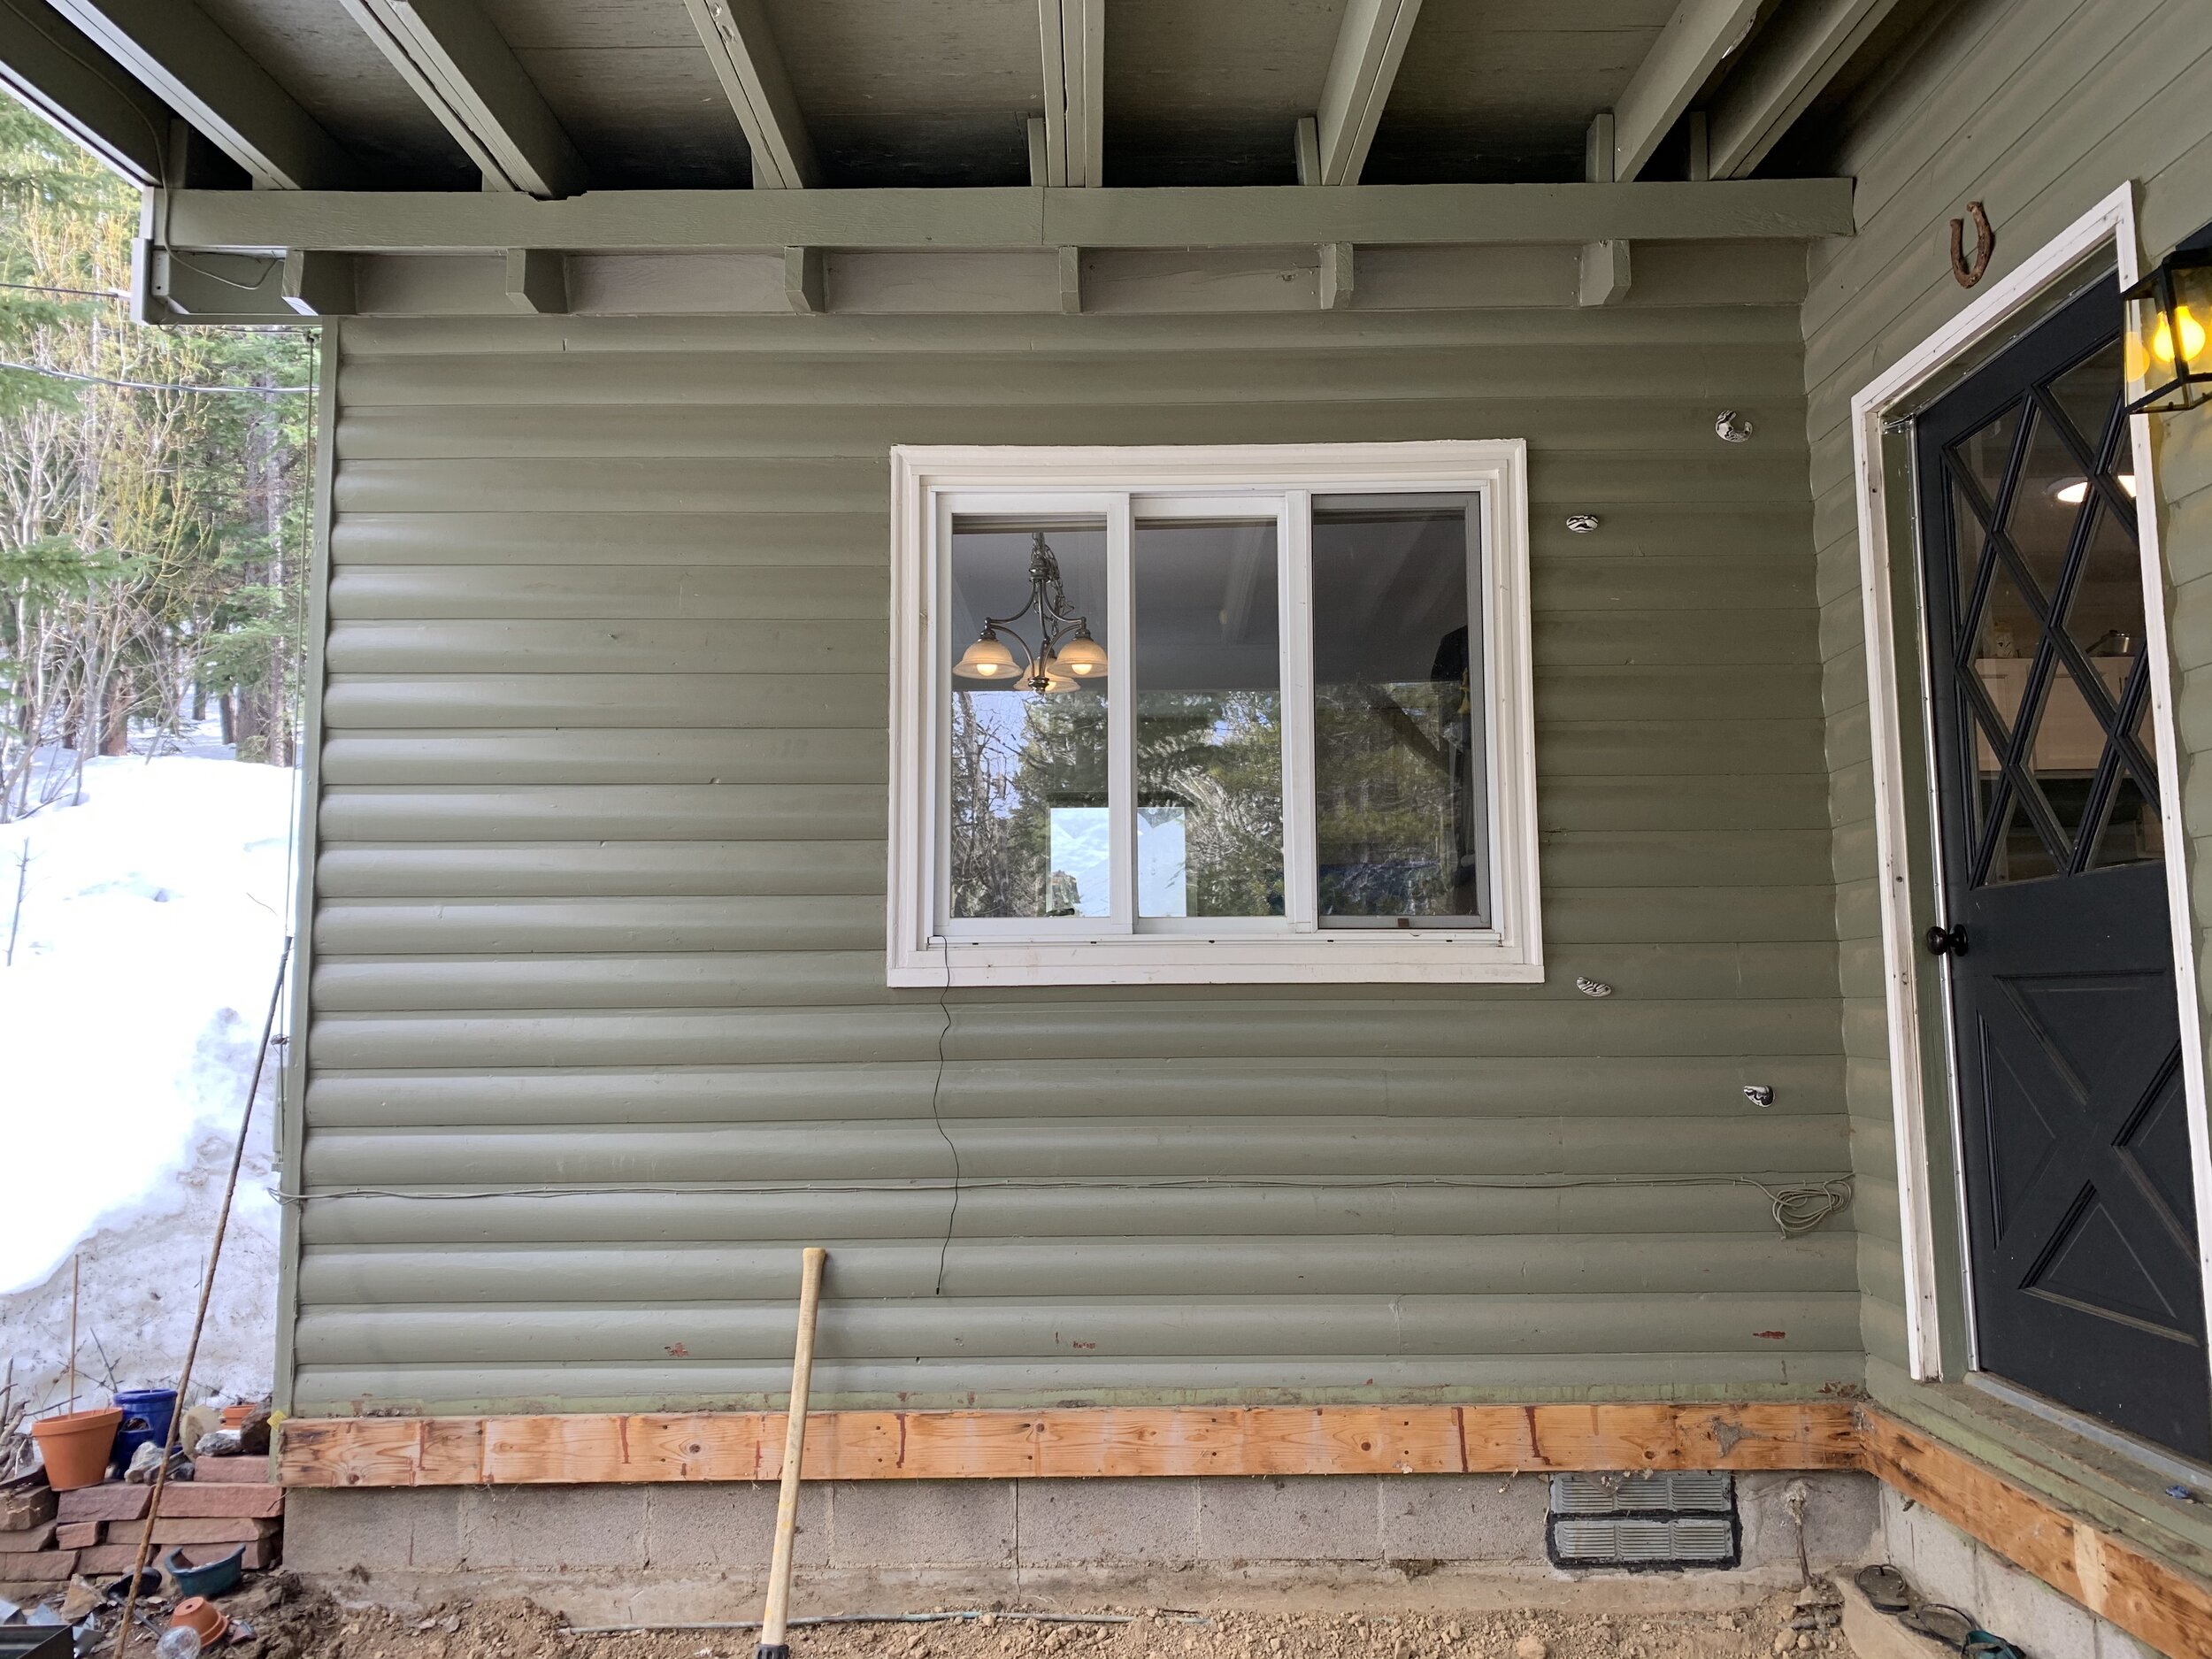
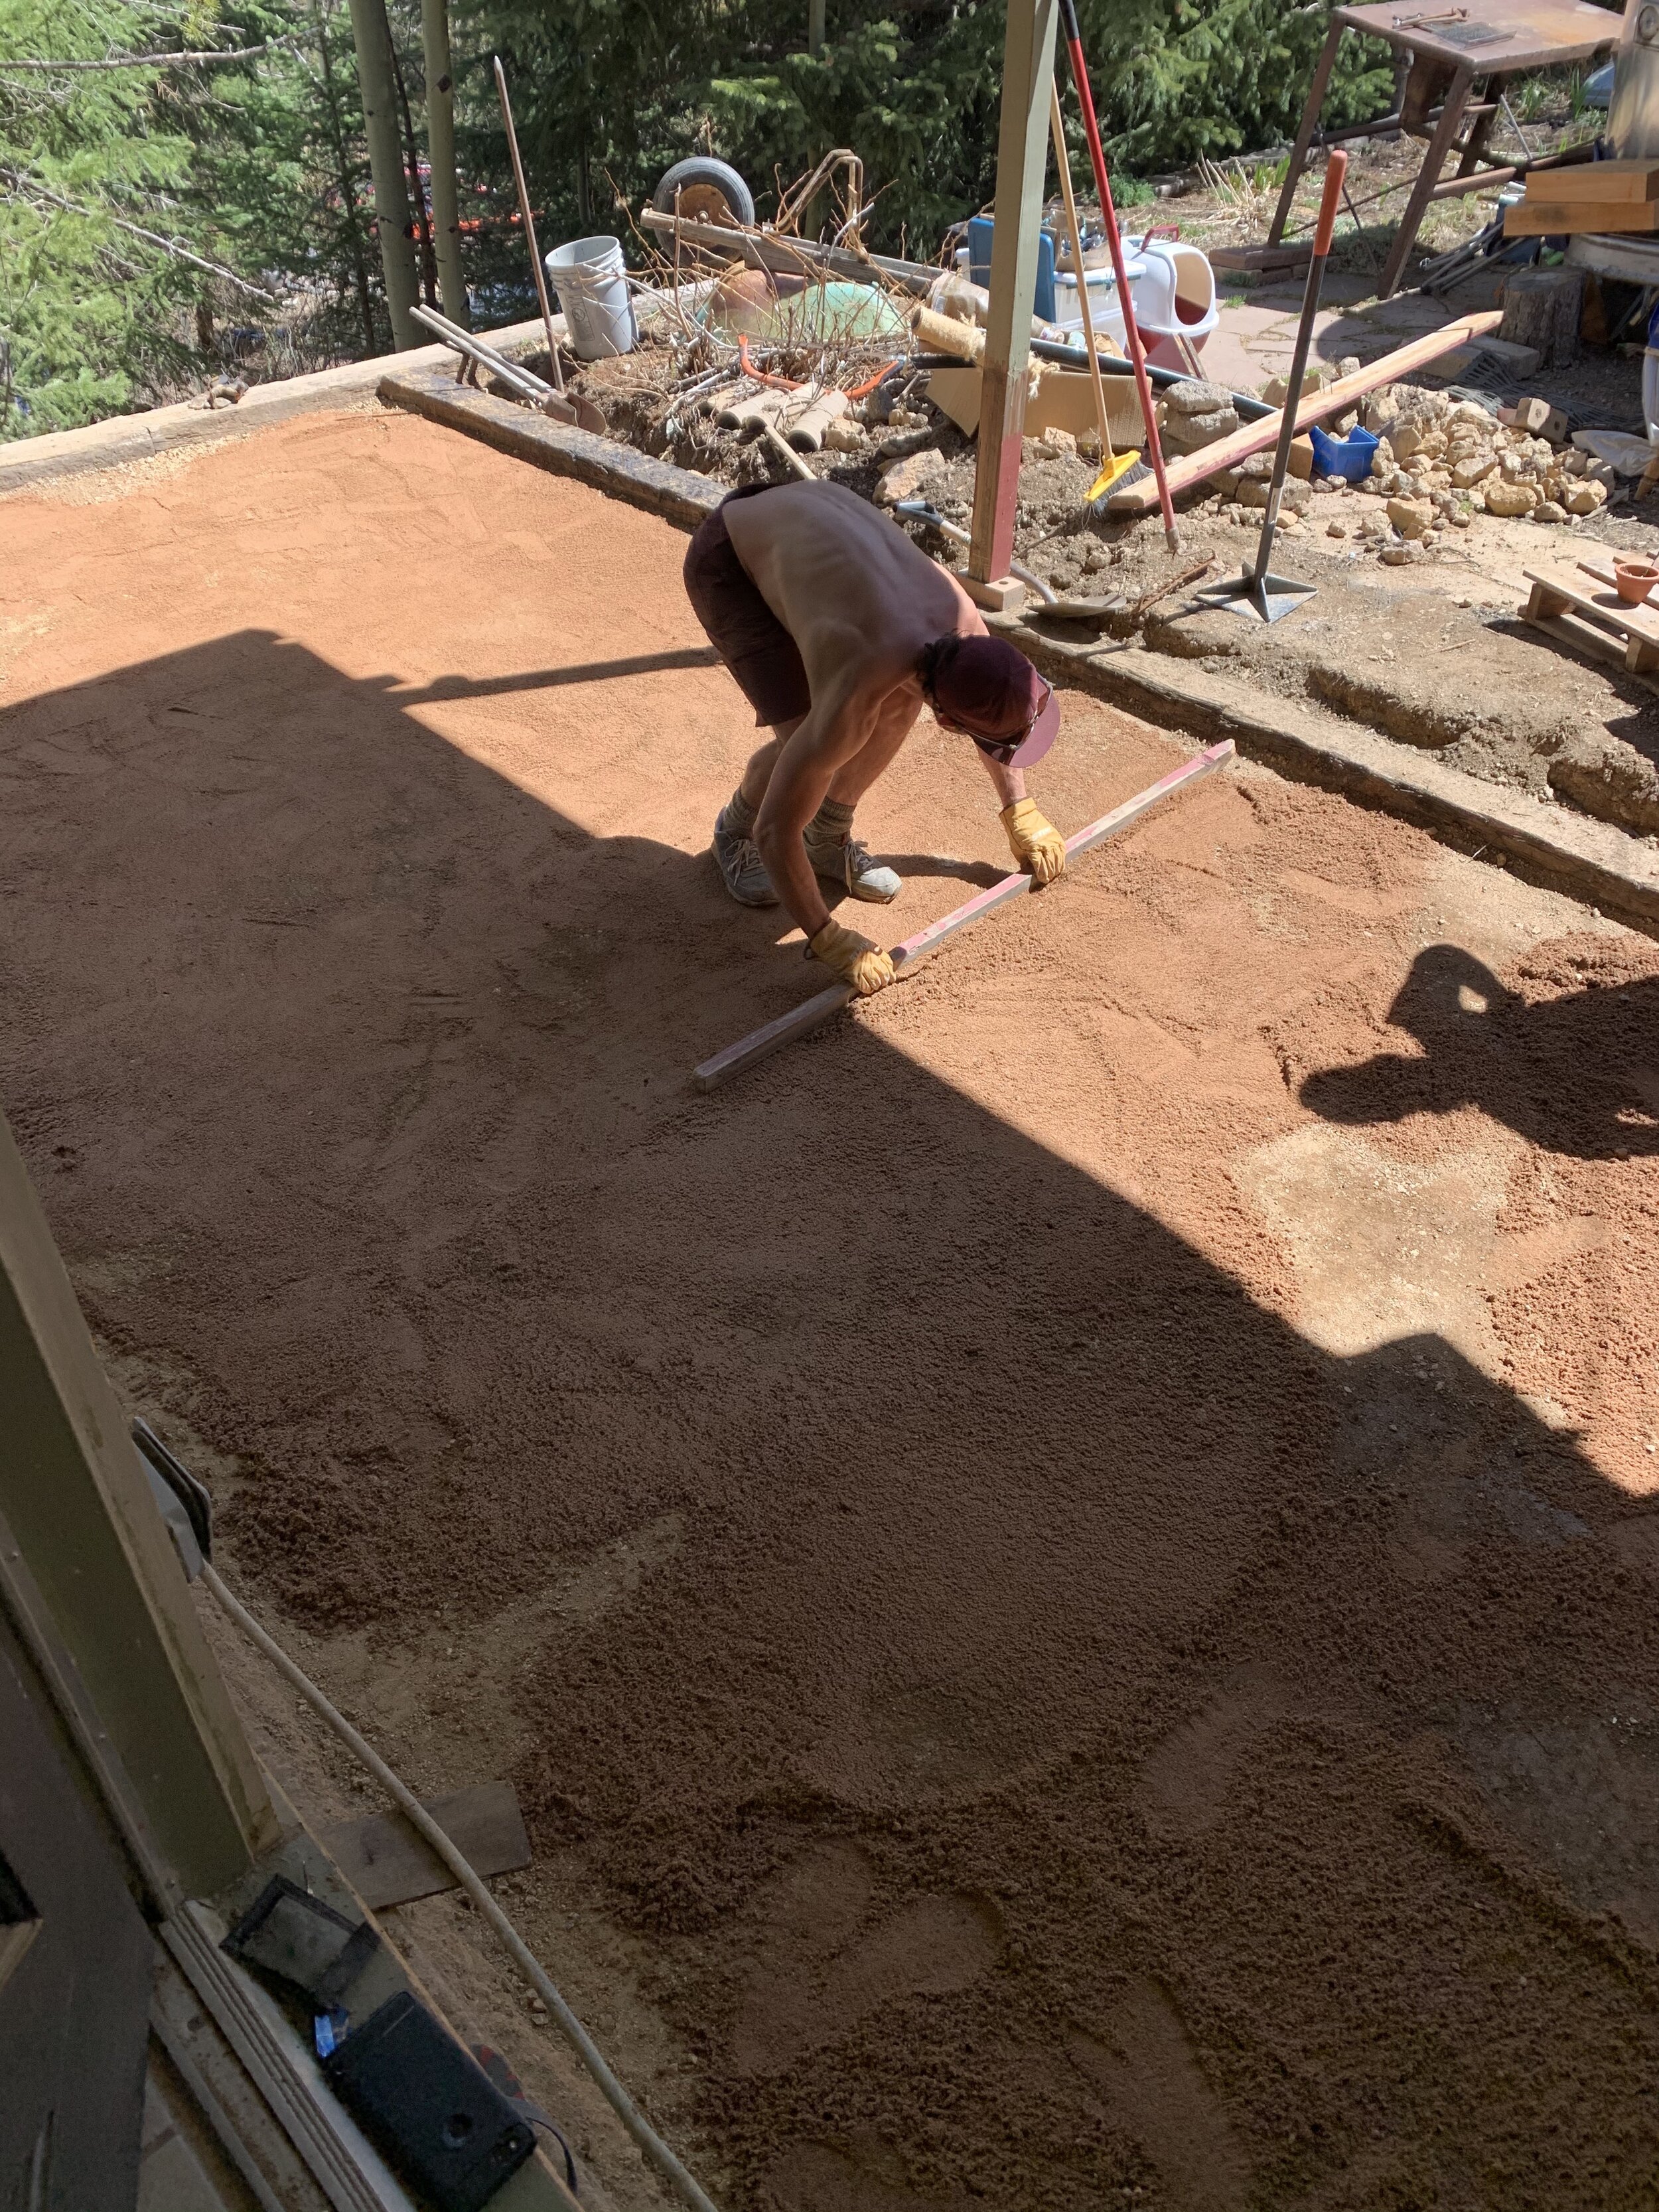
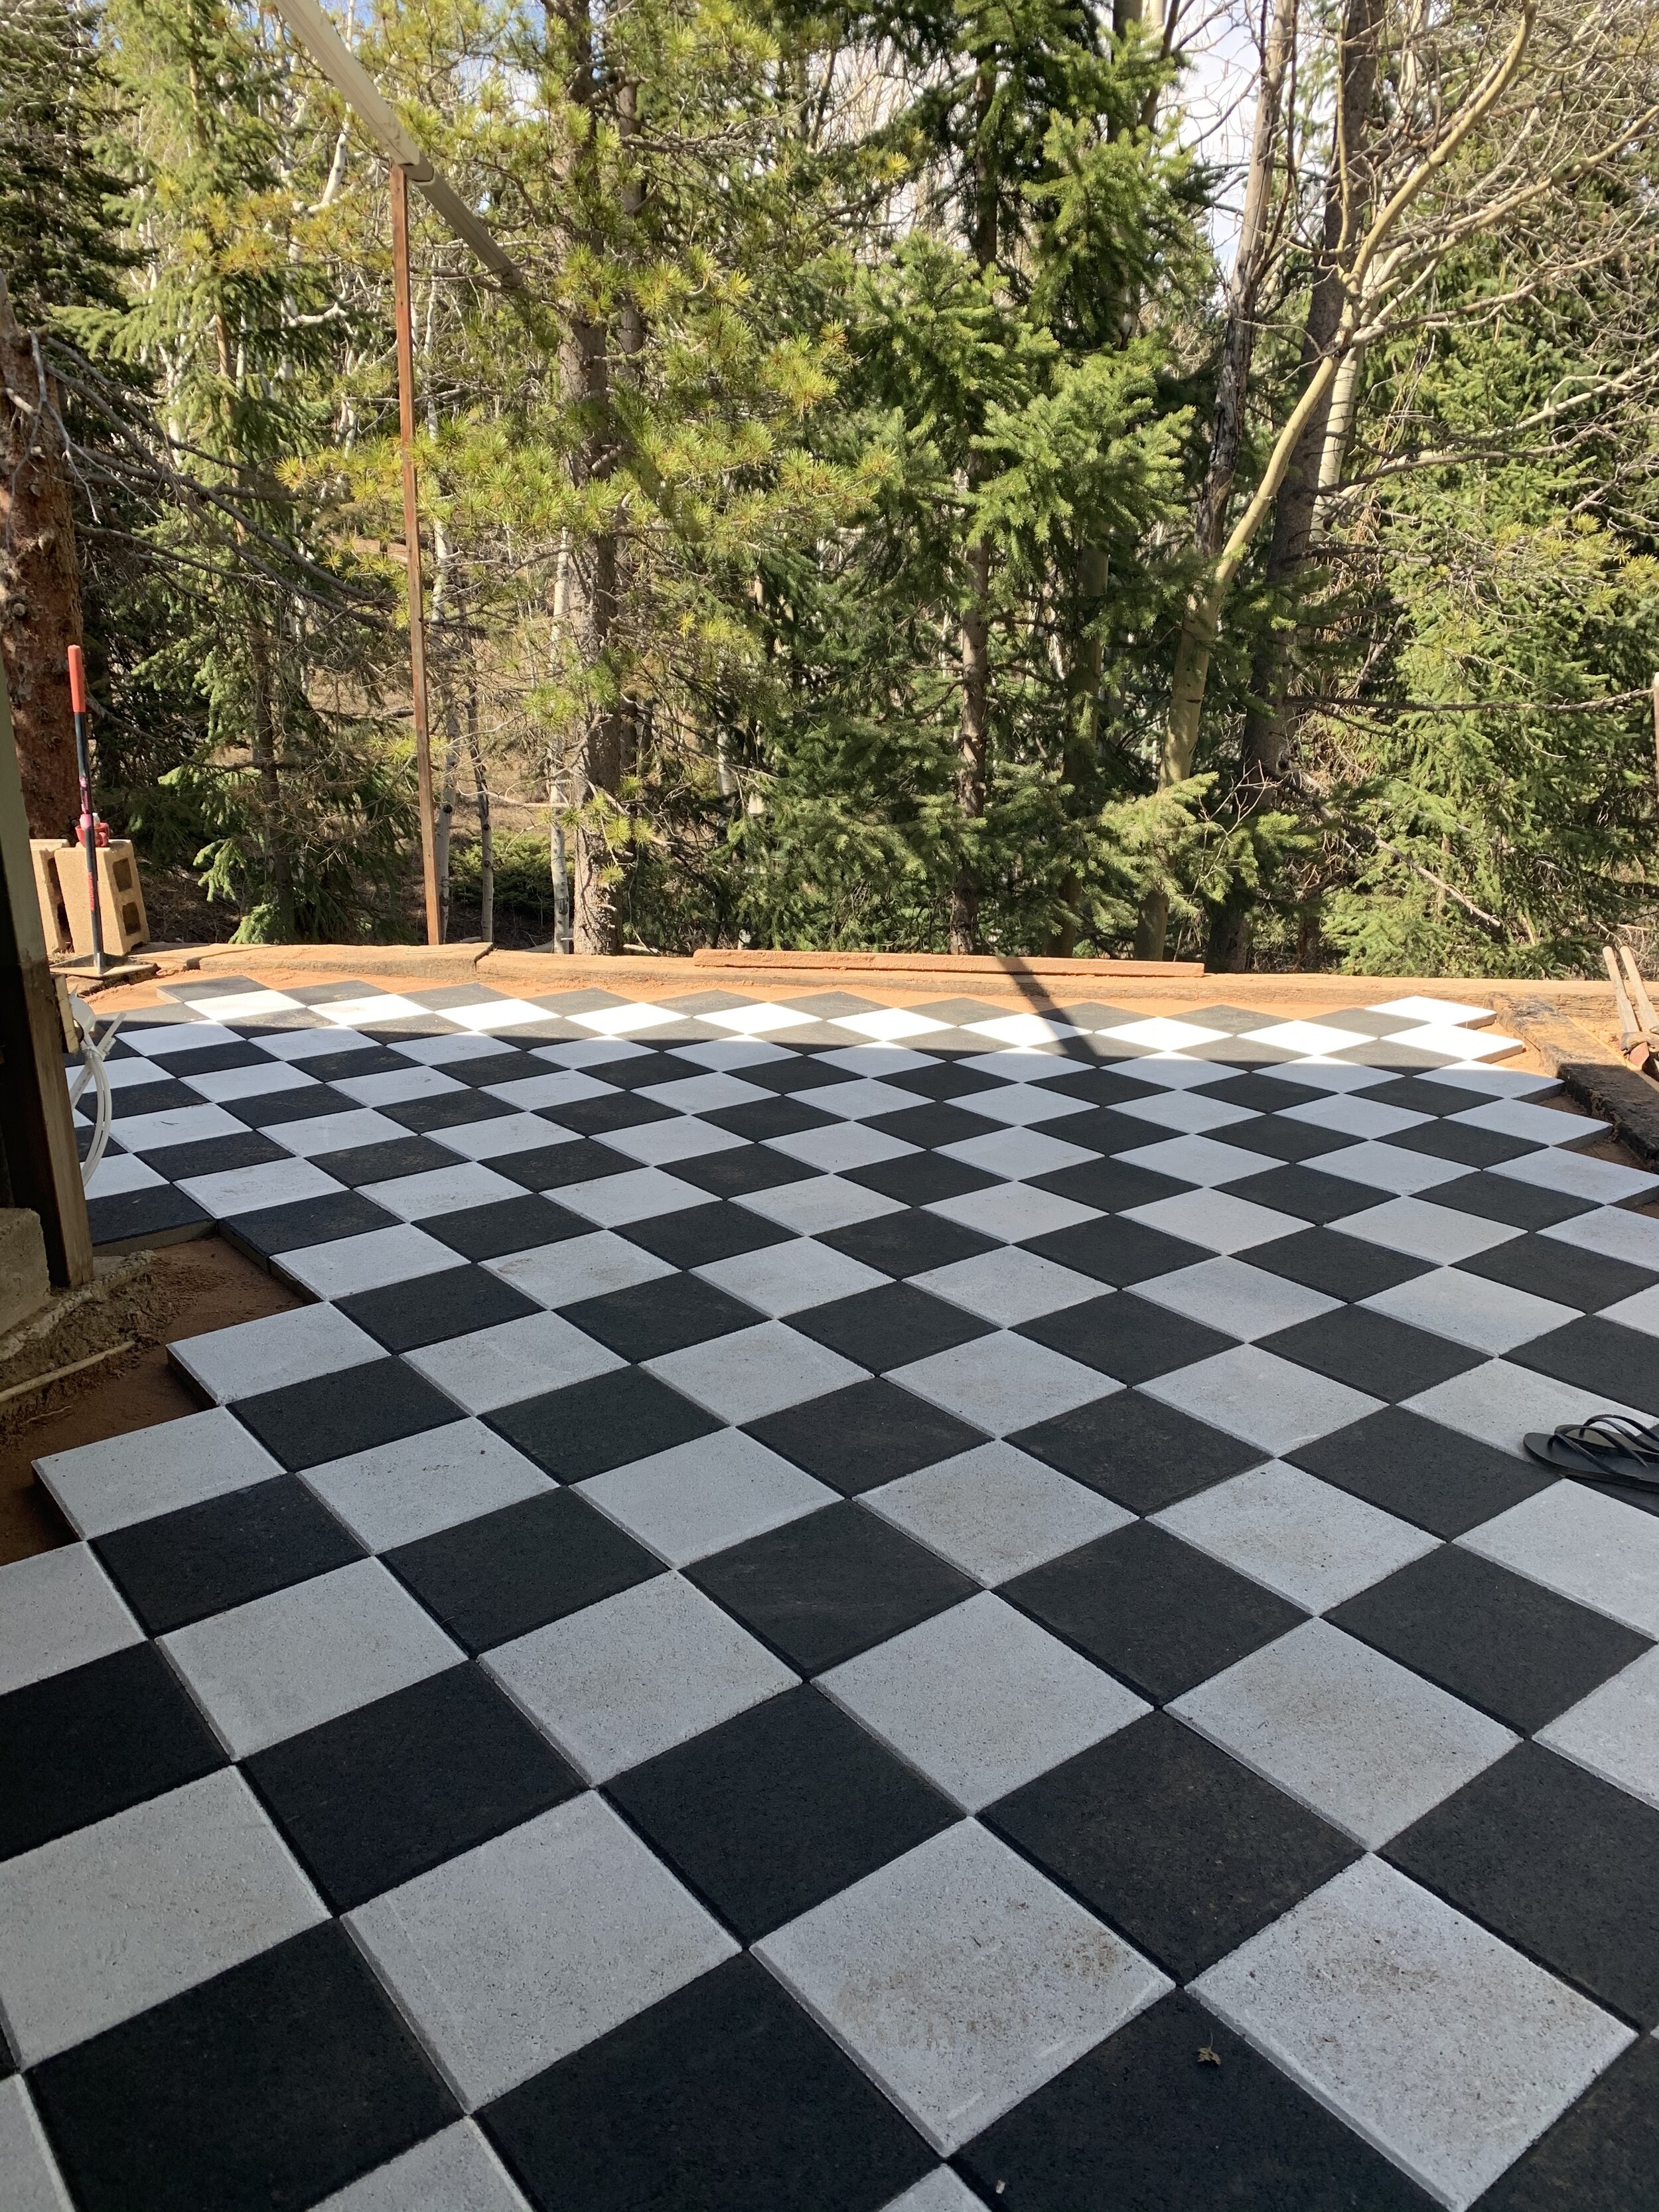
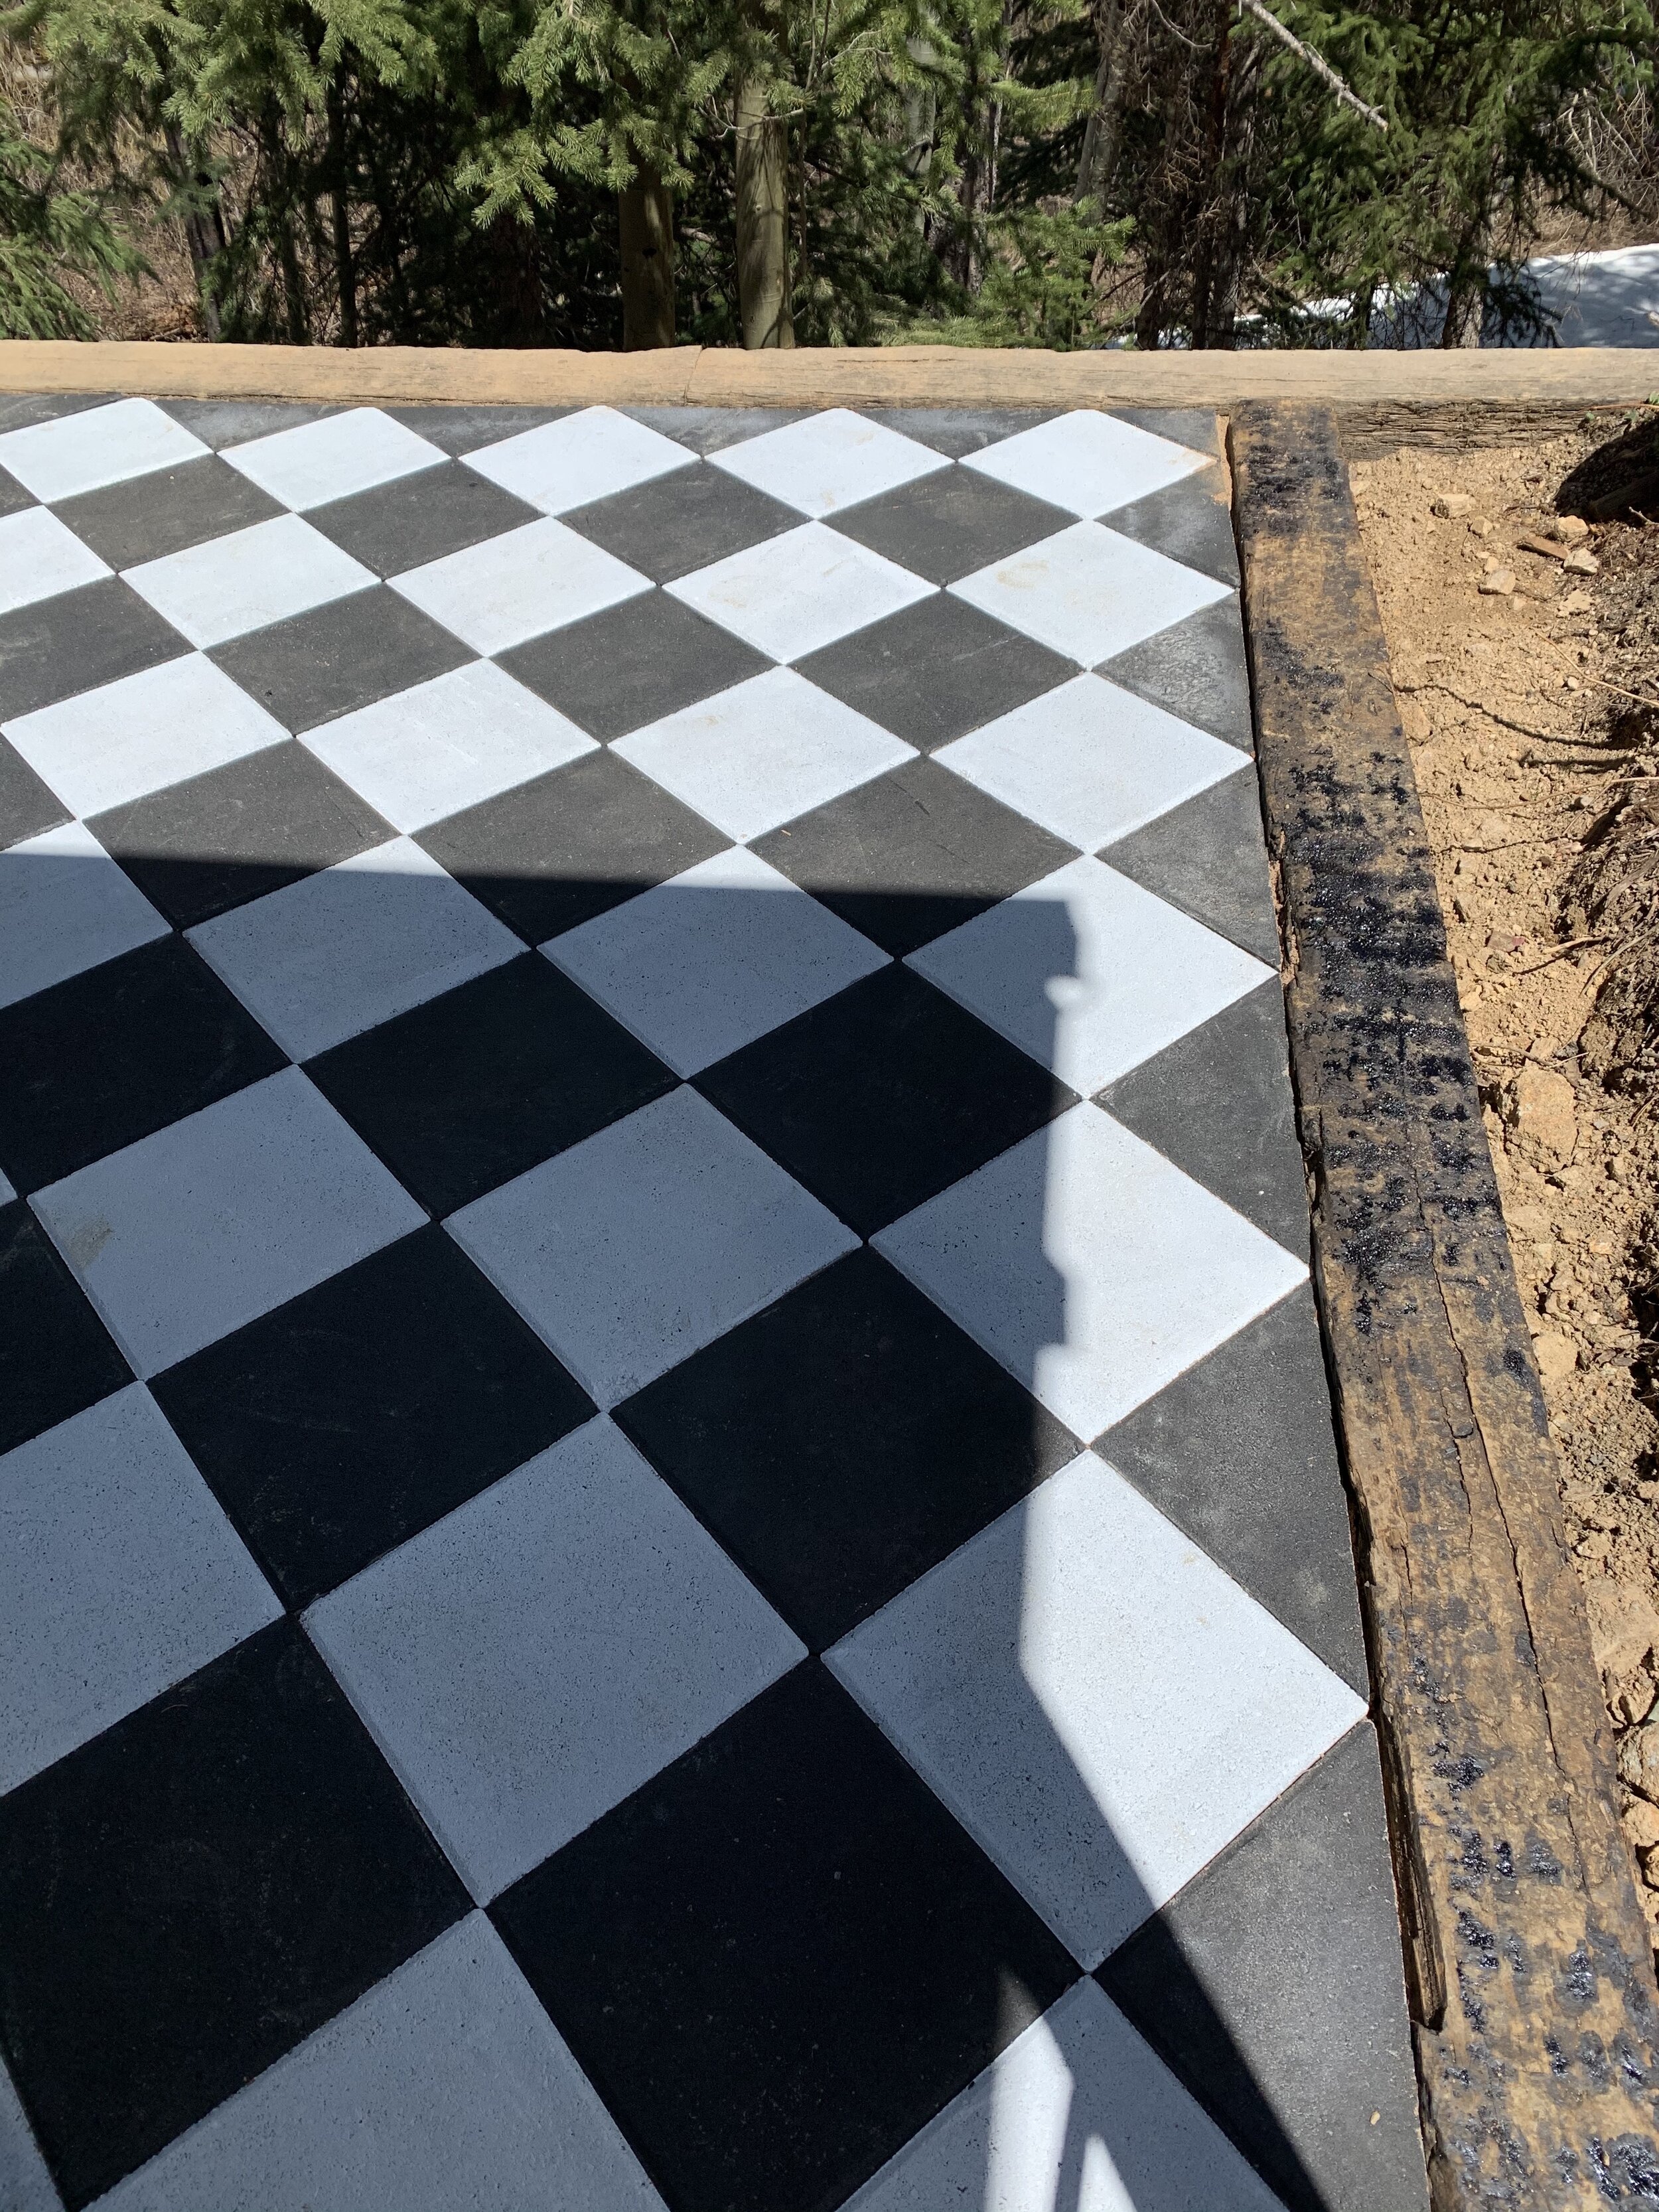
We dreamed up a way to create a (heated!!) harlequin patterned patio floor for our conservatory and brought it to life in about three weeks. Carl and Peter started by ripping out the deck, digging and digging the frozen ground until it was level, digging trenches around the perimeter of where the patio would be for the railroad ties (which will hold all of the pavers in place), laying a bit of leveling sand to make it even more level and then using garden staples to hold some tubing in place (that will later have a solar panel attached to it to heat the water inside to create radiant floors!!!!), added more sand on top of that while I painted about 300 pavers with two coats each of black or white garage floor paint (that has epoxy in it so it will stand up to foot traffic), and then we laid them very carefully in the sand. Then the boys rented a masonry saw and cut the edge pavers with a clean line to fill in the gaps!!!

Scroll down for photos of the whole process, and I’ll link to the products we used at the bottom of this post.

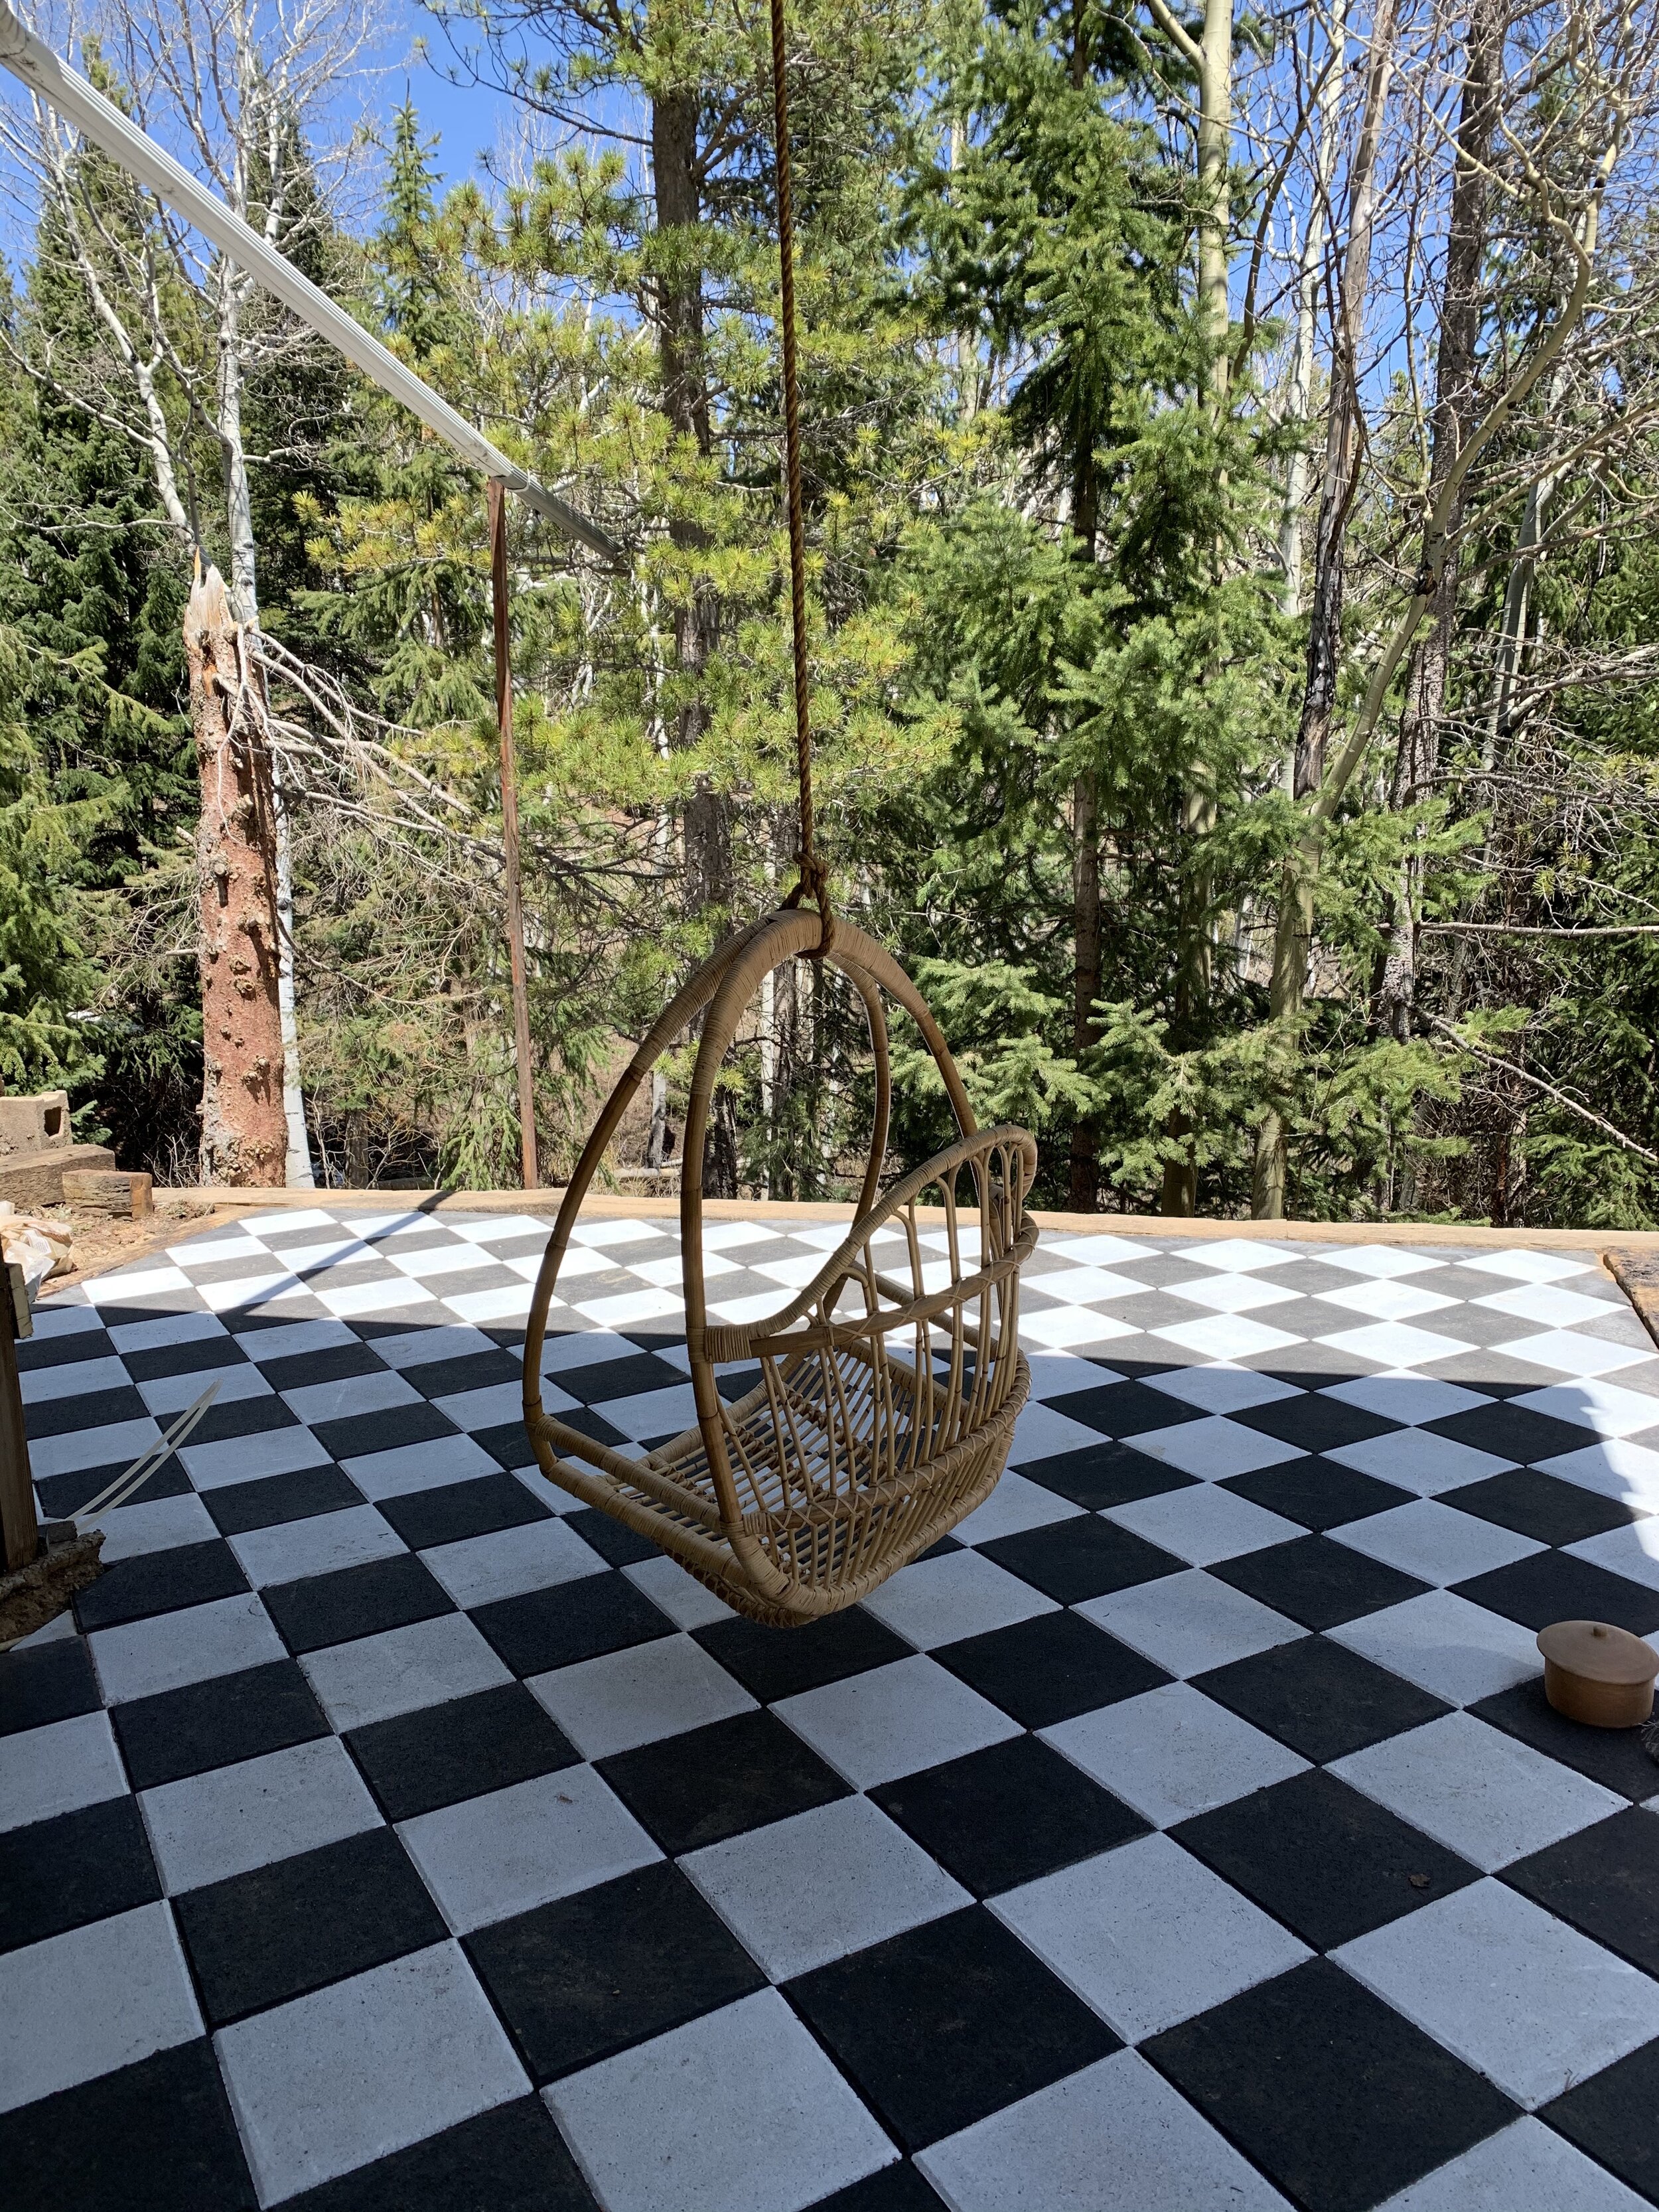
HERE IT IS! The final product!!!

DIY Harlequin Patio for $1000!

As a reminder- here’s just about the same view three weeks ago…

IMG_3935 2.jpg

Again, here were the steps:

  1. Dig the dirt until it’s level (literally, put a level on the dirt as you do this). We live at 9000 feet and our terrain is very rocky, so we do not need to put gravel down below the sand but if your ground is softer than ours a few inches of gravel under the sand will help make this more level and drain better!

  2. Create a border for the patio. We used these railroad ties for that.

  3. Paint your pavers. I used this garage floor paint in black and white. I was able to paint about 150 sq ft of paver with each gallon (two coats- concrete really drinks paint up!!) These are the pavers we used. We laid them out on wooden beams in our dirt driveway and it was a two day process to paint them all two coats. I used a mini foam roller.

  4. Lay 1/4” of leveling sand. Depending on how big your patio area is, you might be able to get leveling sand delivered cheaper in bulk from a stoneyard. We were only covering about 280 sq ft so we didn’t need as much as we would’ve had to buy to get it delivered in bulk.

  5. Use garden staples to hold down plastic tubing similar to this, which we will later tell you how to turn into a radiant floor base! *Make sure both ends of the tube stick out of the ground somewhere when you finish laying the pavers so you can fill them with water and attached to a pump/heater.

  6. Cover the tubing with the final 3/4” of sand and level. Tamp down.

  7. Start to lay your pavers in the corner on a diagonal. To get them to sit really snug, place each one all the way up to the sides of the one that’s already down and then gently push it into place.

  8. We rented a masonry saw to cut the edge pieces, and just measured how to cut them by scribing the edge to cut.

  9. When the last of the sand that we have (two bags are left) is fully dry, we’ll sprinkle it over the top and sweep it into any cracks to really set the stones into place.

There you have it! Feel free to message me or Carl on instagram if you have any process questions!!

Things I Liked This Week vol. 2 by audrey gebhardt

This week felt dreamy. We drank in sunshine up in our Treehaus, sat in our mega classy inflatable hot tub that was one of the best purchases of 2019, opened all of the windows in our very high altitude mountain house(!), the hummingbirds are back(!!) and we decided that we’re cake people. As in, we are people that always have a cake in the fridge to eat. All the time. It’s making this weird time feel quite celebratory and I am here for it! Here’s some other dreamy stuff from around the web this week:

via Kinfolk

\\ Love this piece about ‘making do with what is’ (we are for sure making the best of this situation!)

\\ Admiring this colorful and love-filled instagram.

\\ I can’t wait to have somewhere to wear this to.

\\ This is the hardest part about grocery shopping these days!

\\ I LOVE handleless mugs.

\\ A table I want the most.

\\ You can do SO MUCH in a day! (Also, you can do absolutely nothing and that’s definitely fine too).

Treehouse Inspiration by audrey gebhardt

We’re building a treehouse. We’re calling it Treehaus, and we’ve got some big big plans for this lil baby in the sky that I can’t wait to tell you about!

I first started thinking about treehouses in 2012. I imagined building a house in the sky (all by myself) attached to my house on Long Island. I had about $5000 to spend on it because I was a bartender living with my dad and didn’t know how much money that was in real life. I saw the one pictured below (Camp Wandawega) and was smitten with the idea, telling all of the guys that would sit at my bar that I was going to do this. And theeeeen- I told my dad. The one who’s house it was. The one who is a real estate broker and knows all about building codes and he said no. Little did I know, seven years later I’d be living with a guy who happens to have a ton of construction experience. And also had his own dream of a stellar treehouse in his backyard. So here we are, building the treehouse we both dreamed of from 2000 miles apart.

Here are some baller treehouses that might inspire you to have your own castle-in-the-clouds dream!

Camp Wandawega Treehouse
Camp Wandawega Treehouse, via Apartment Therapy

Camp Wandawega Treehouse, via Apartment Therapy

Dreamy Tropical Treehouse
Dreamy Tropical Treehouse (in Hawaii!) via Airbnb

Dreamy Tropical Treehouse (in Hawaii!) via Airbnb

Willow Treehouse via Airbnb
Mega-Mod Willow Treehouse via Airbnb complete with Swedish wood burning hot tub!

Mega-Mod Willow Treehouse via Airbnb complete with Swedish wood burning hot tub!

Cauliflower Fried 'Rice' (V + GF) by audrey gebhardt

Serve this to EVERYONE. Vegans and Gluten Frees and Paleos (I think?) and grain free friends and people that eat everything because this is bomb and easy and just takes some chopping time. Add some honey if you’re not vegan. Use soy sauce if you’re not GF. Throw an egg in at the end and call it GOOD.

V/GF Cauliflower Fried Rice

INGREDIENTS
(makes enough for 4 as a side, 2 as lunch)

1 bag frozen cauliflower rice (~3 cups)
1 tsp olive oil/coconut oil
1 shallot, diced
1” ginger, grated (optional- don’t make a special trip if you don’t have it)
2 cloves garlic, grated
1 large carrot, diced small
2 stalks celery, diced small
1 c frozen peas (or fresh, whatever)
1/4 c chopped cashews
2 TBSP soy sauce or coconut aminos if GF
1/2 tsp honey (optional, omit if vegan)
1 tsp miso (also optional)
1 1/2 tsp sriracha
1 lime, cut into wedges

Start by chopping all of your veggies and setting them aside in a bowl because once that’s done, the rest is QUICK.

Saute the shallot in the oil over medium heat until translucent. Add the ginger, garlic, carrot, celery and peas and cook for 5-7 minutes until the veggies start to soften. Add the frozen cauliflower, cashews, soy sauce, honey, miso and sriracha and cook for another 7-9 minutes or so until the cauliflower is warmed through and tender. Serve with a wedge of lime and cilantro if you have it.

Optional: Add two eggs in after the cauliflower is cooked through and cook for another 2 minutes, moving the mixture around constantly to scramble the eggs into the fried rice! YUM.

VEGAN GLUTEN FREE GRAIN FREE 30 MINUTE FRIED RICE.jpg

Sugar Mtn Catering x Rocky Mtn Bride by audrey gebhardt

My work was featured in a PRINT MAGAZINE, friends! Rocky Mountain Bride created a whole photoshoot around the cheeseboards I’ve been perfecting for years now! I’ve known about this for about six months now but I’ve kept it under wraps because I really wanted to surprise my Mima with a copy of the finished copy in the mail. Thankfully, I was asleep when she got it and received the best voicemail of all time from her because of it!

I haven’t spoken about it much on the blog- but I own Sugar Mountain Catering, a catering company based in the Rocky Mountains of Colorado as well as Long Island. We specialize in creating edible experiences. From 18 foot Grazing Tables and dinner parties full of surprise courses (even for the host!) to late night wedding popcorn and sweet/savory Fairy Floss, we have fun with food.

The ladies over at Rocky Mountain Bride reached out to me in the fall and pretty much said, ‘do what you want and make it beautiful’. So basically, my favorite words in the English language. I created a few of our Classic Grazes, one of our new Brunch Grazes, a Hummus Board and a Date Night Board. Here are some of my favorite shots from the extremely talented Meredith Soy Photography that didn’t all make it into the magazine!

Sugar Mtn. Catering x Meredith Soy Photography for Rocky Mtn Bride